Bug Tracker Install
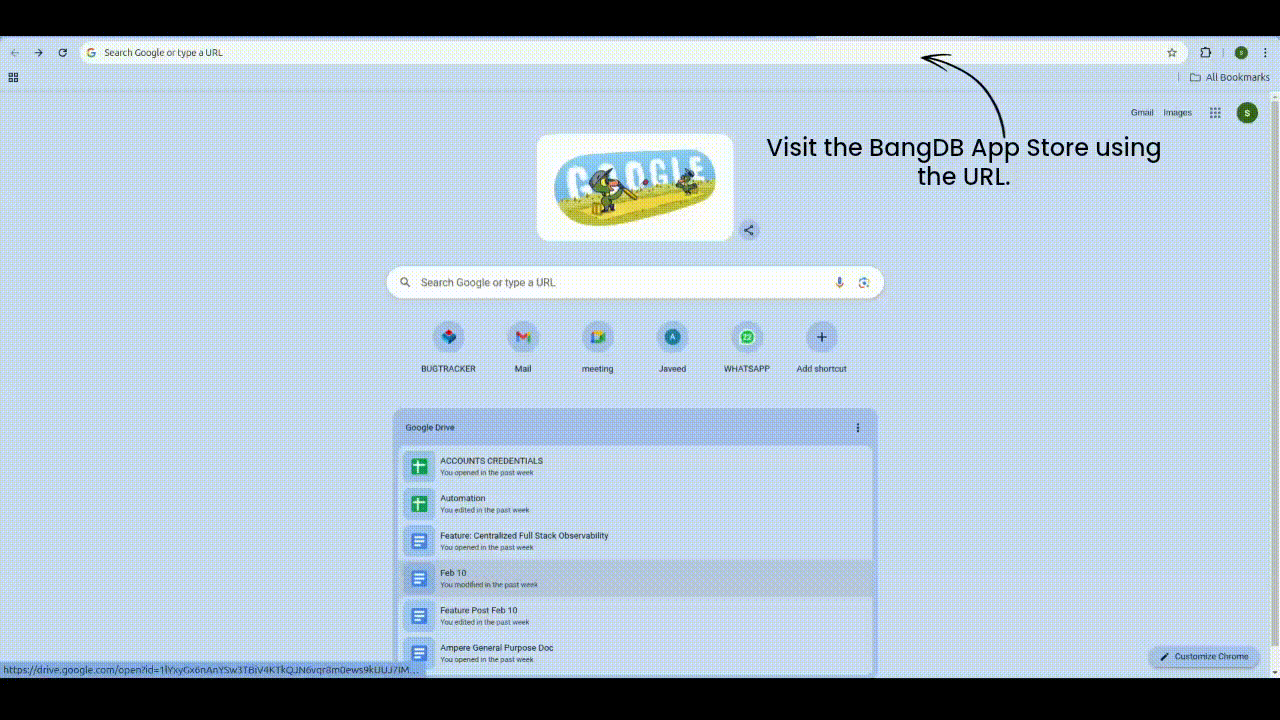
Step 1: Visit BangDB Appstore
Go to the BangDB Appstore by clicking on this link or paste the URL in your browser https://appstore.bangdb.com/.
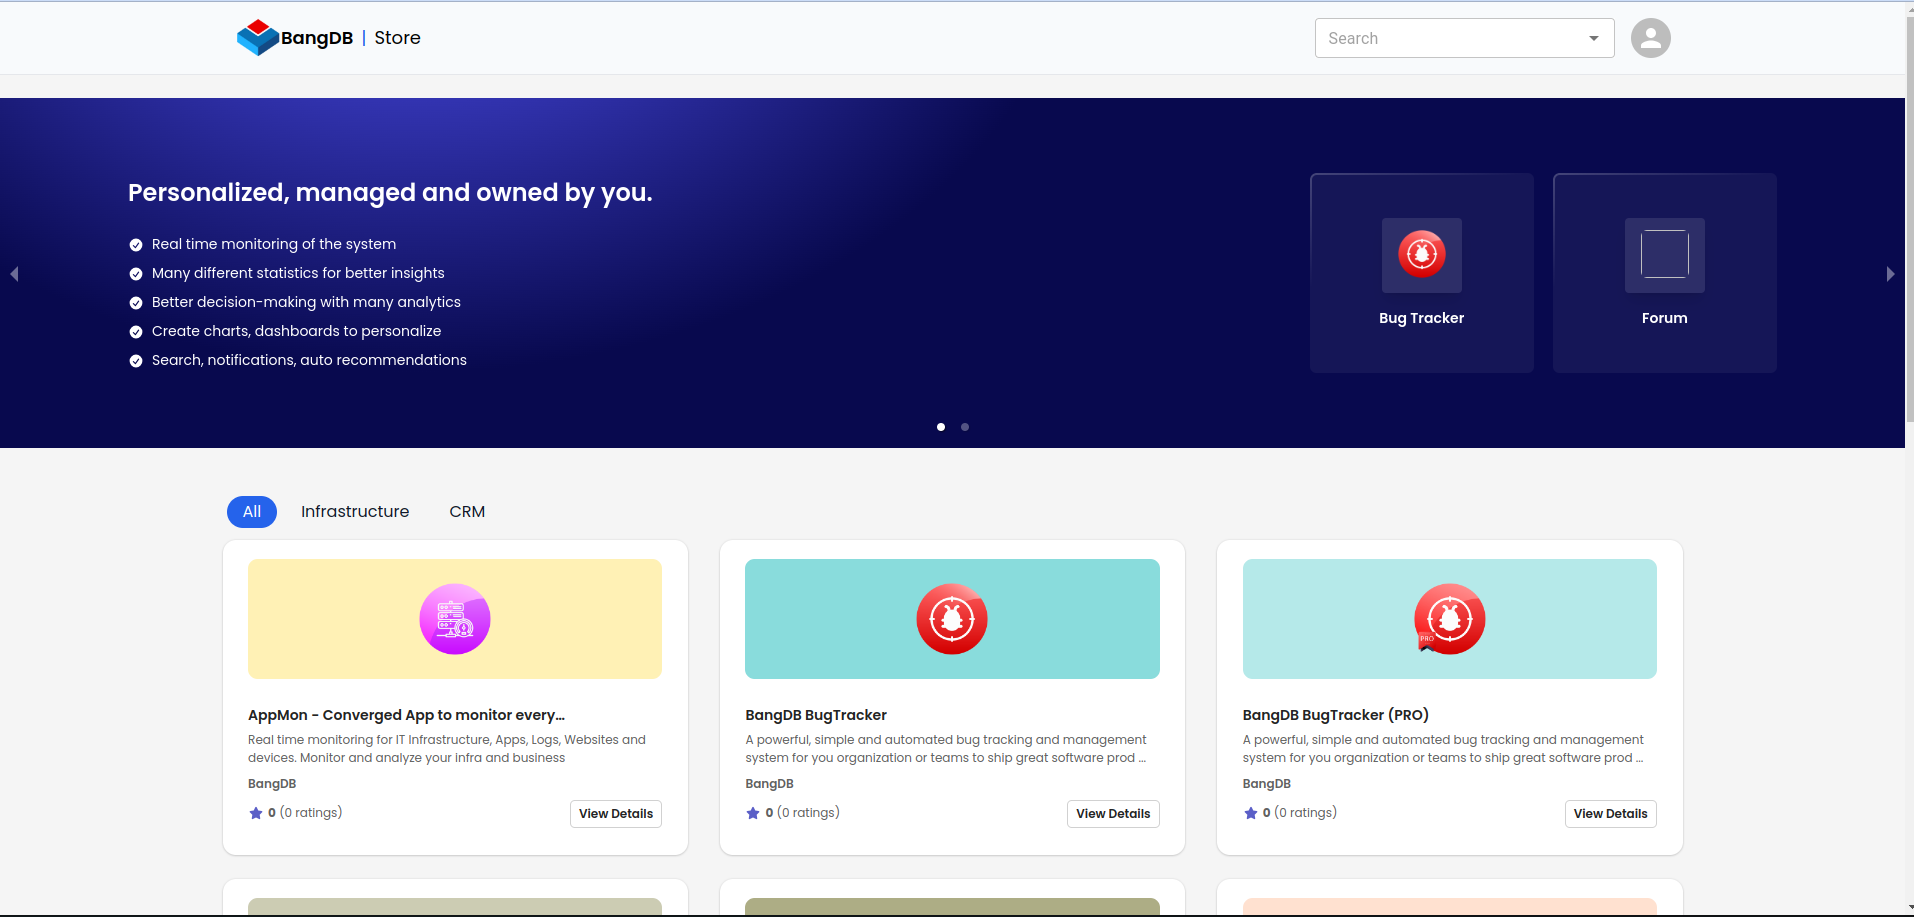
Step 2: Search for Bug Tracker
Once on the BangDB Appstore page, use the search functionality to find the Bug Tracker application.
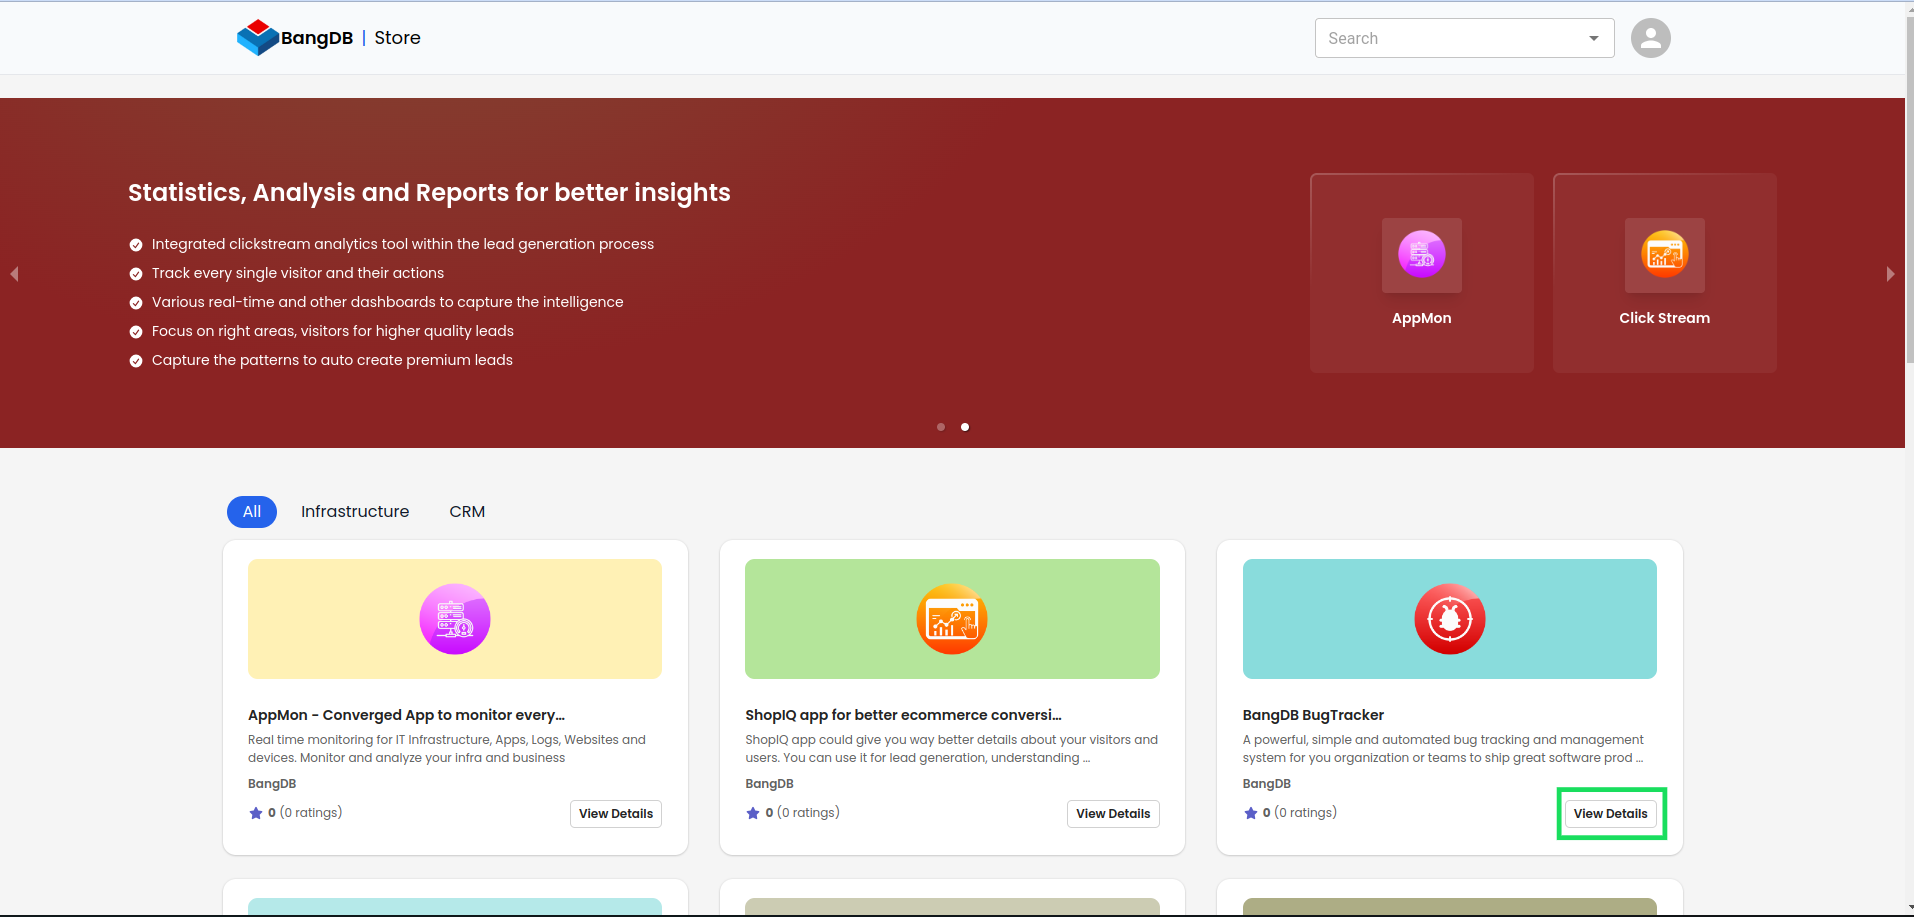
Step 3: Open App Details
After finding Bug Tracker, click on its app card or the View Details button.
Step 4: Select Free Trial or Purchase
BangDB offers a 7-day free trial for Bug Tracker or a direct purchase option. Enable the checkbox for a free trial and click Install.
If you don’t want a trial, leave the checkbox unchecked and click Install.

Step 5: Click Install
Click the Install button to proceed.

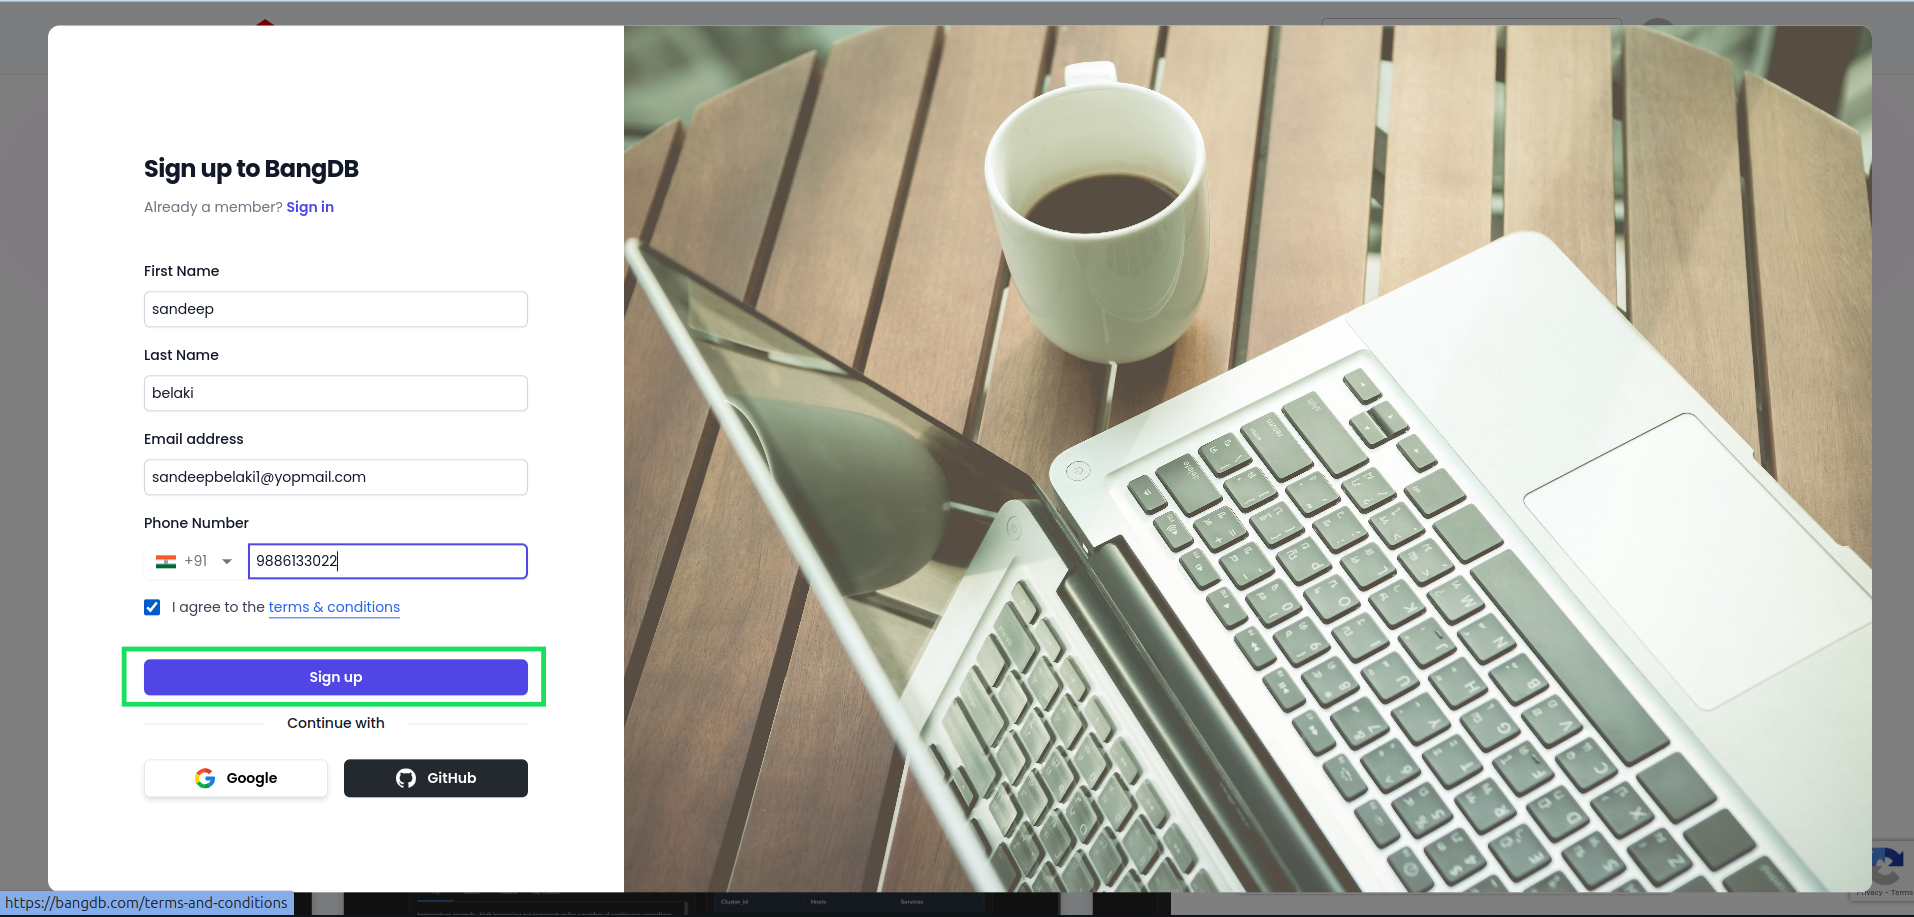
Step 6: Signup Popup
After clicking on install button then it will redirects to the signup popup
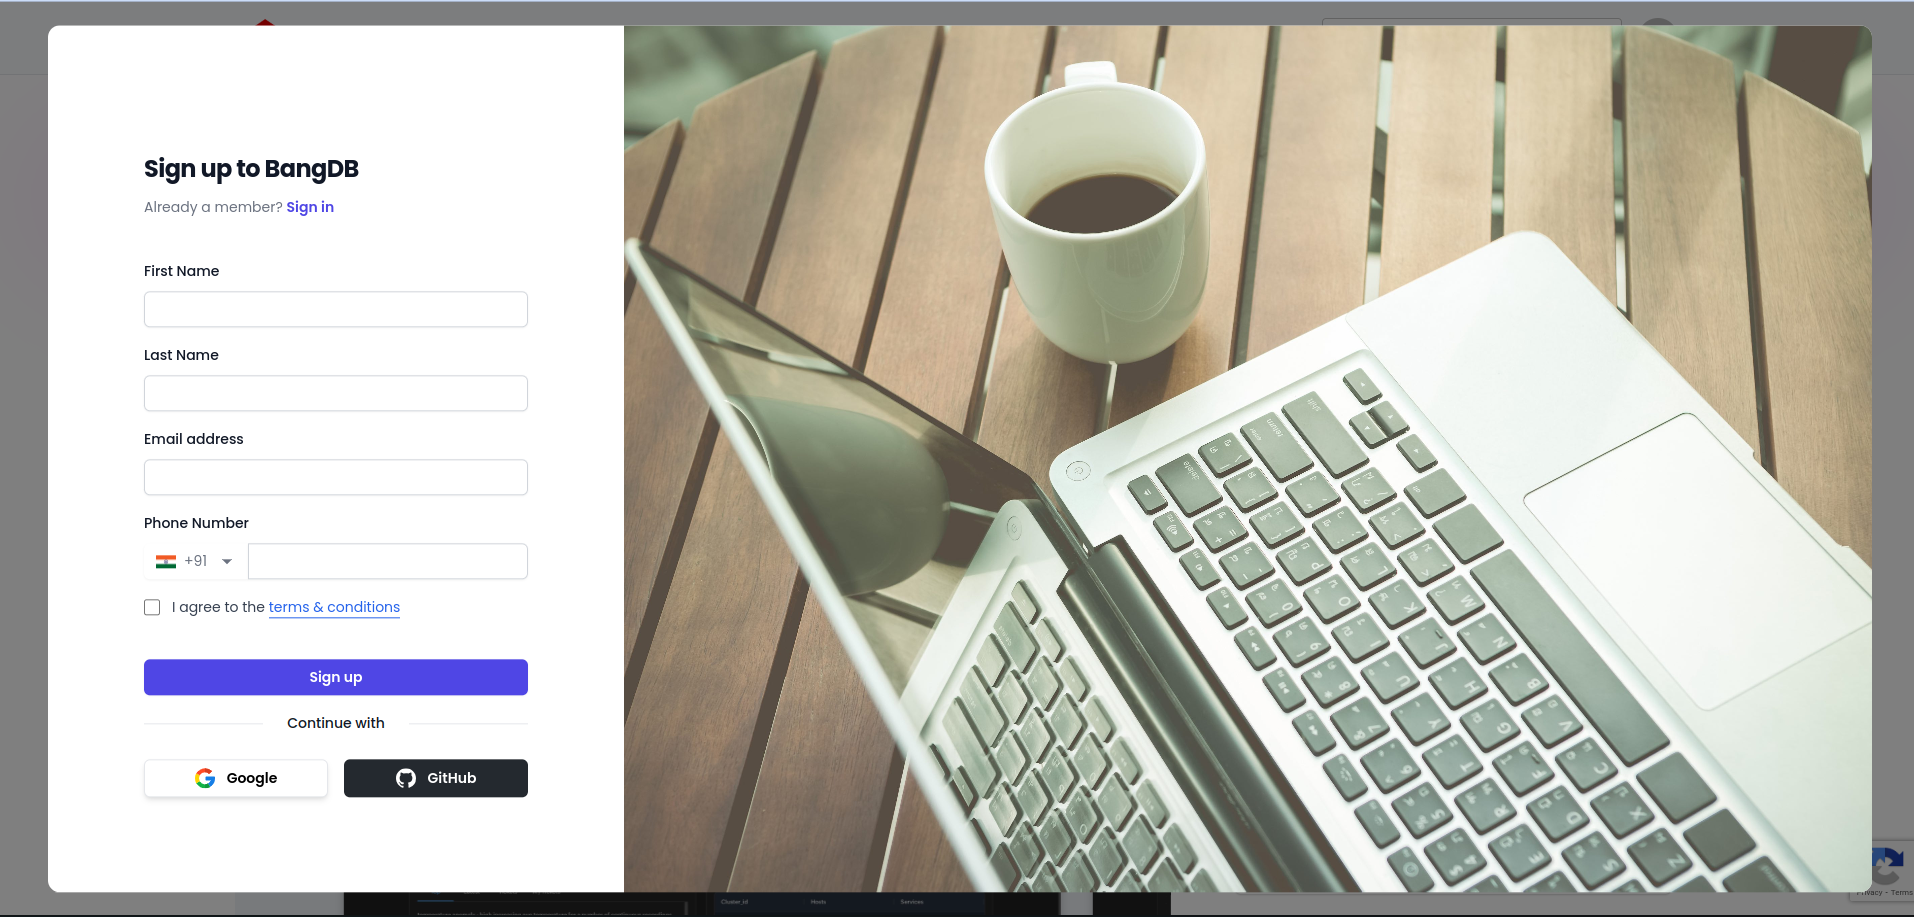
Step 7: Fill Required Details in the Signup Popup
Fill the details which is asked in the signup popup and click on Signup Button.
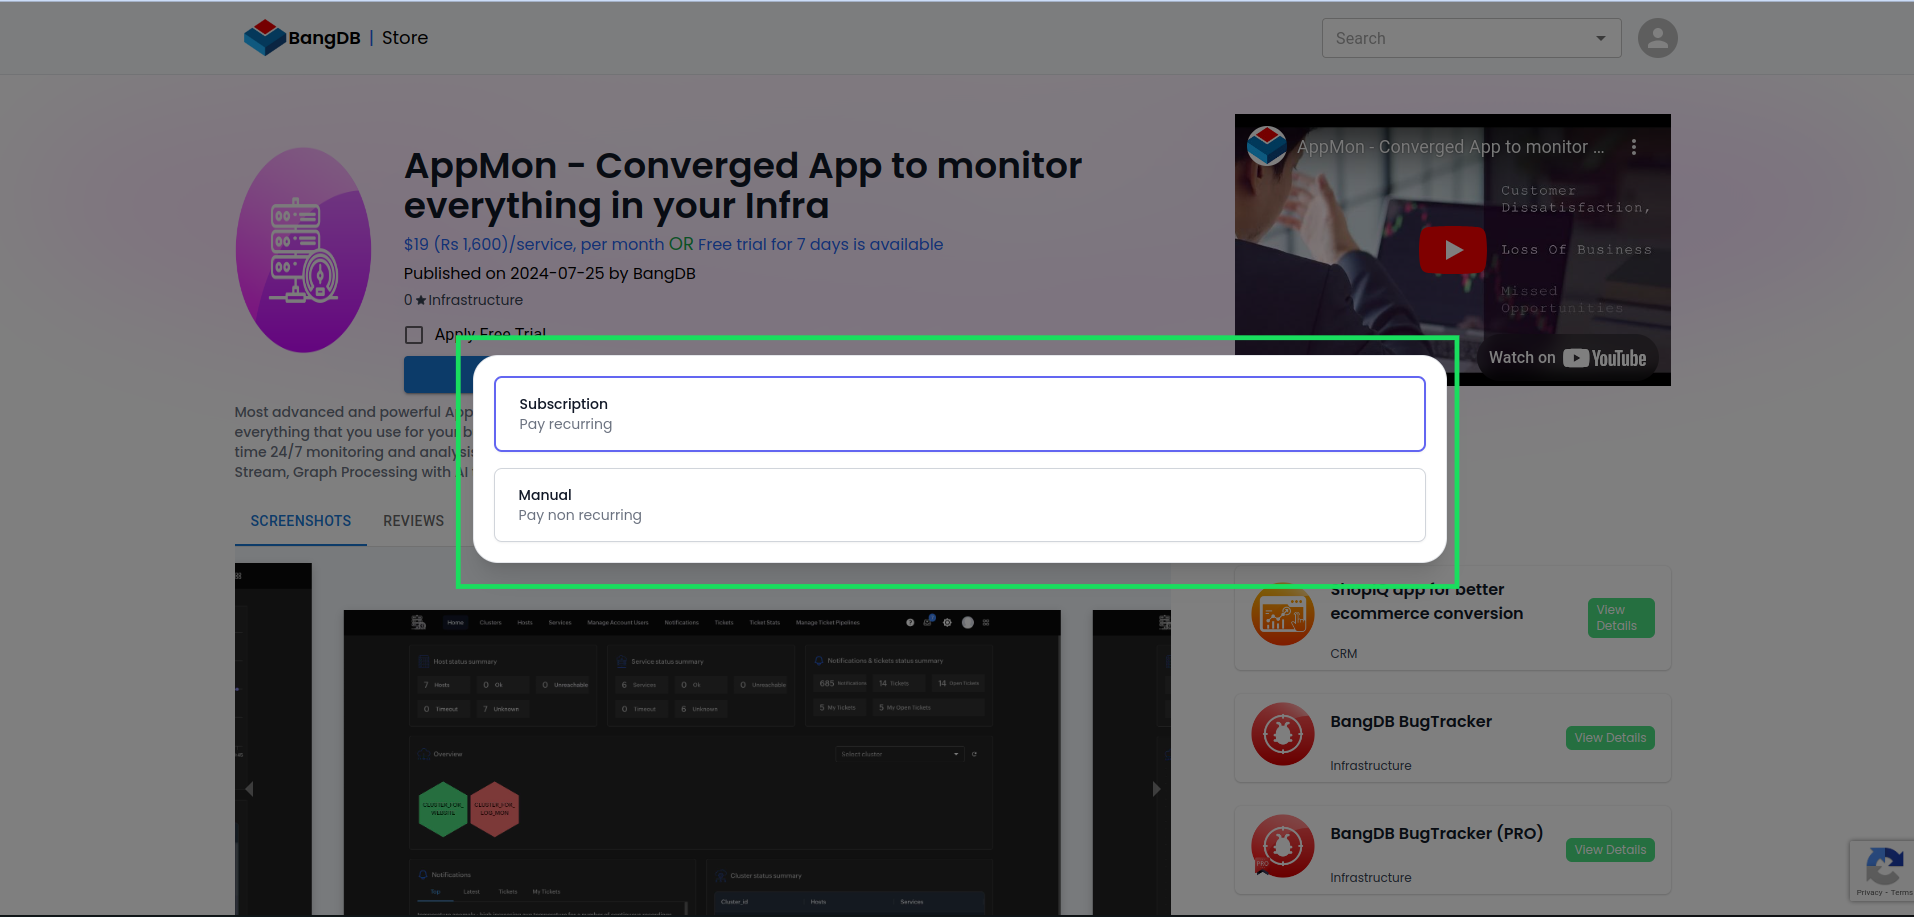
Step 8: Payment Method Selection
A popup will appear asking you to select a payment method: manual or subscription.
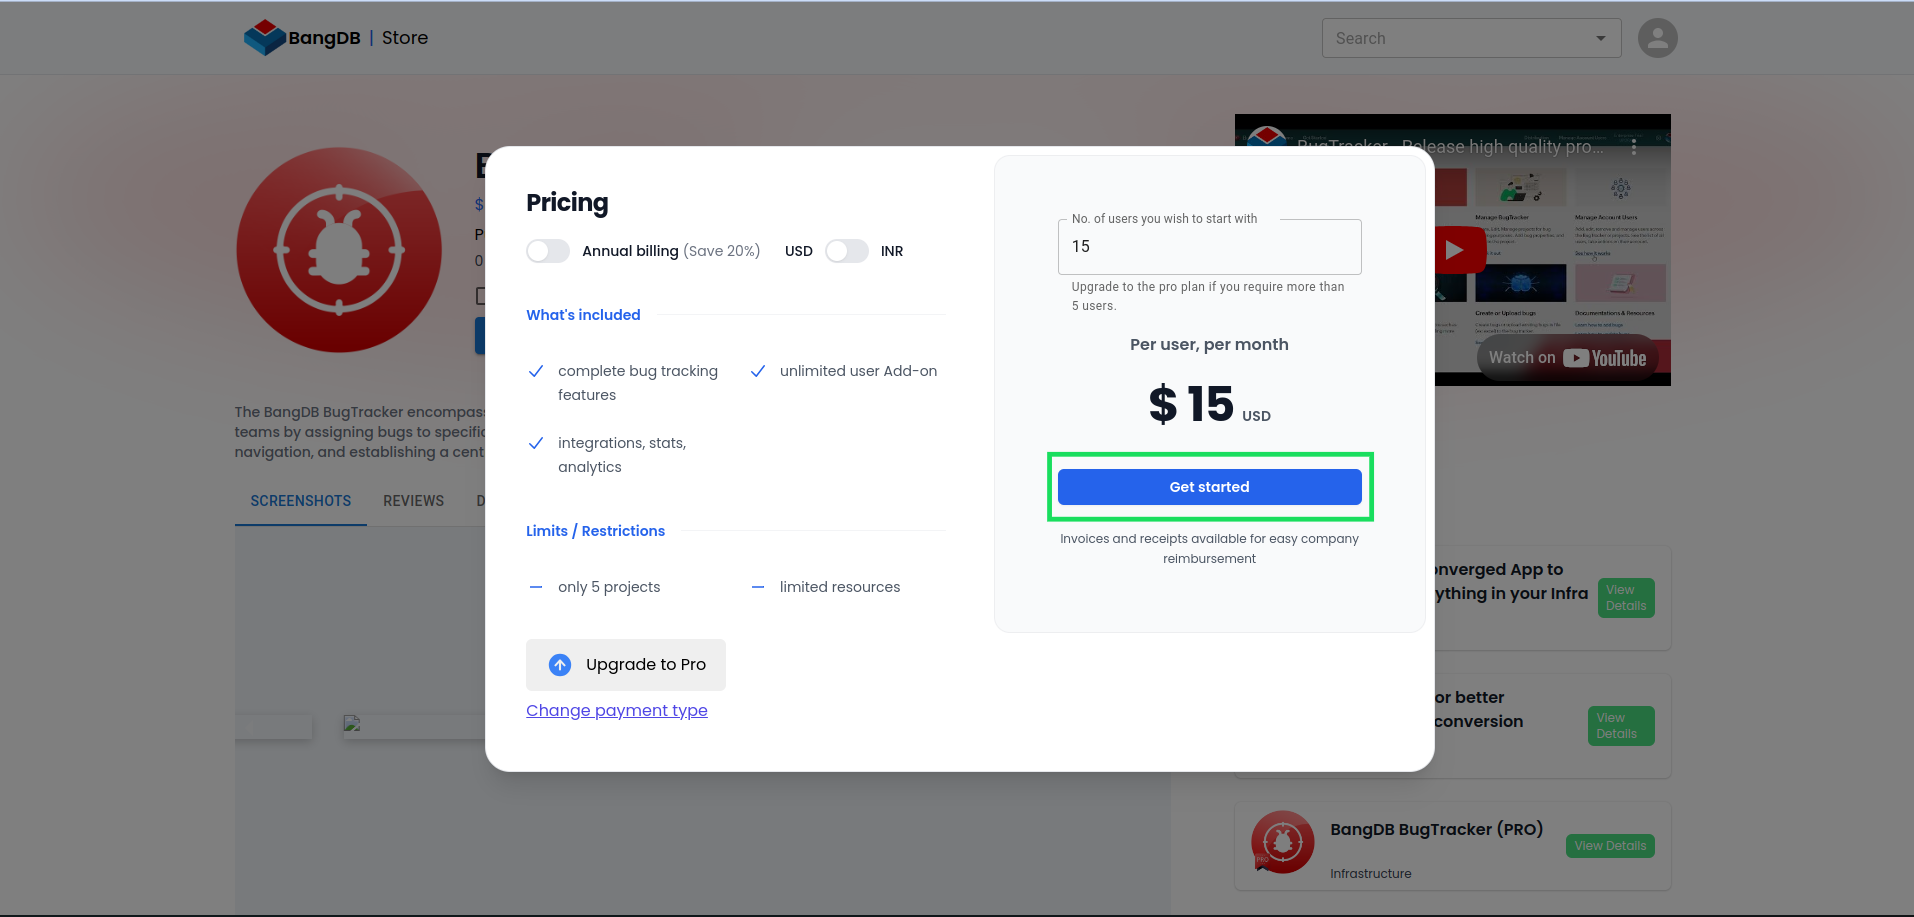
Step 9: Payment Amount and Quantity
Select the quantity and payment mode. Toggle between USD and INR to view pricing.
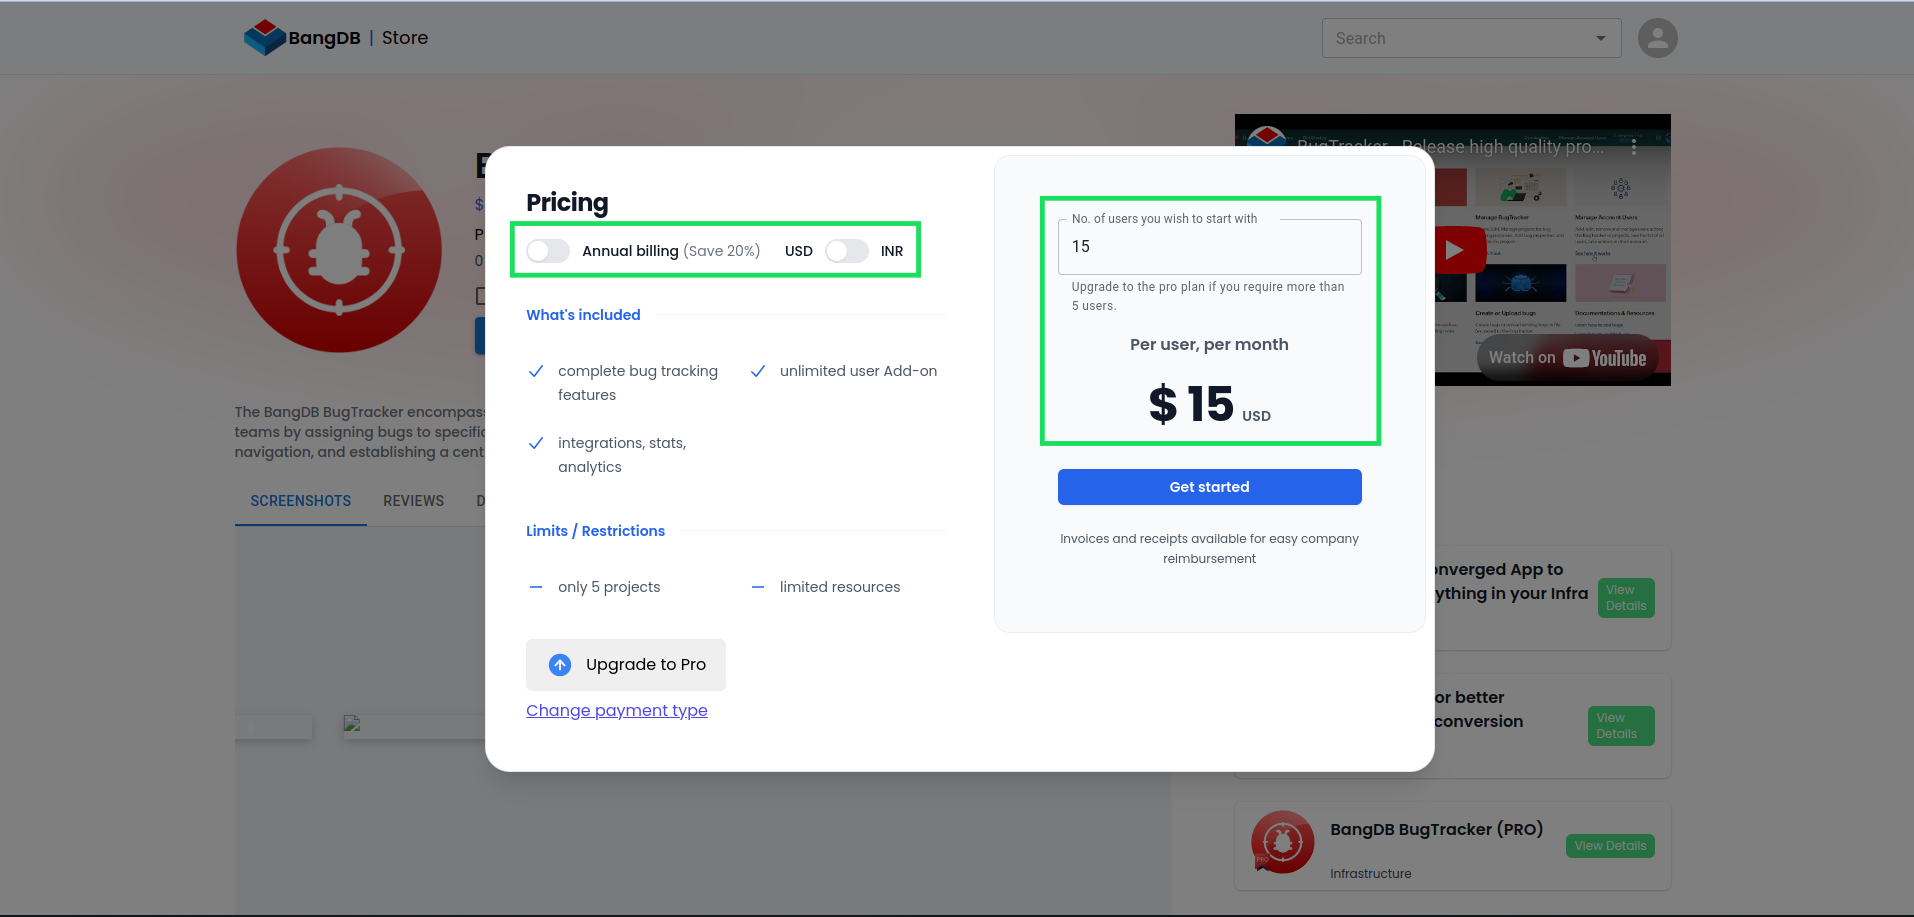
Step 10: Confirm Purchase
After selecting the payment options, click Get Started to proceed.
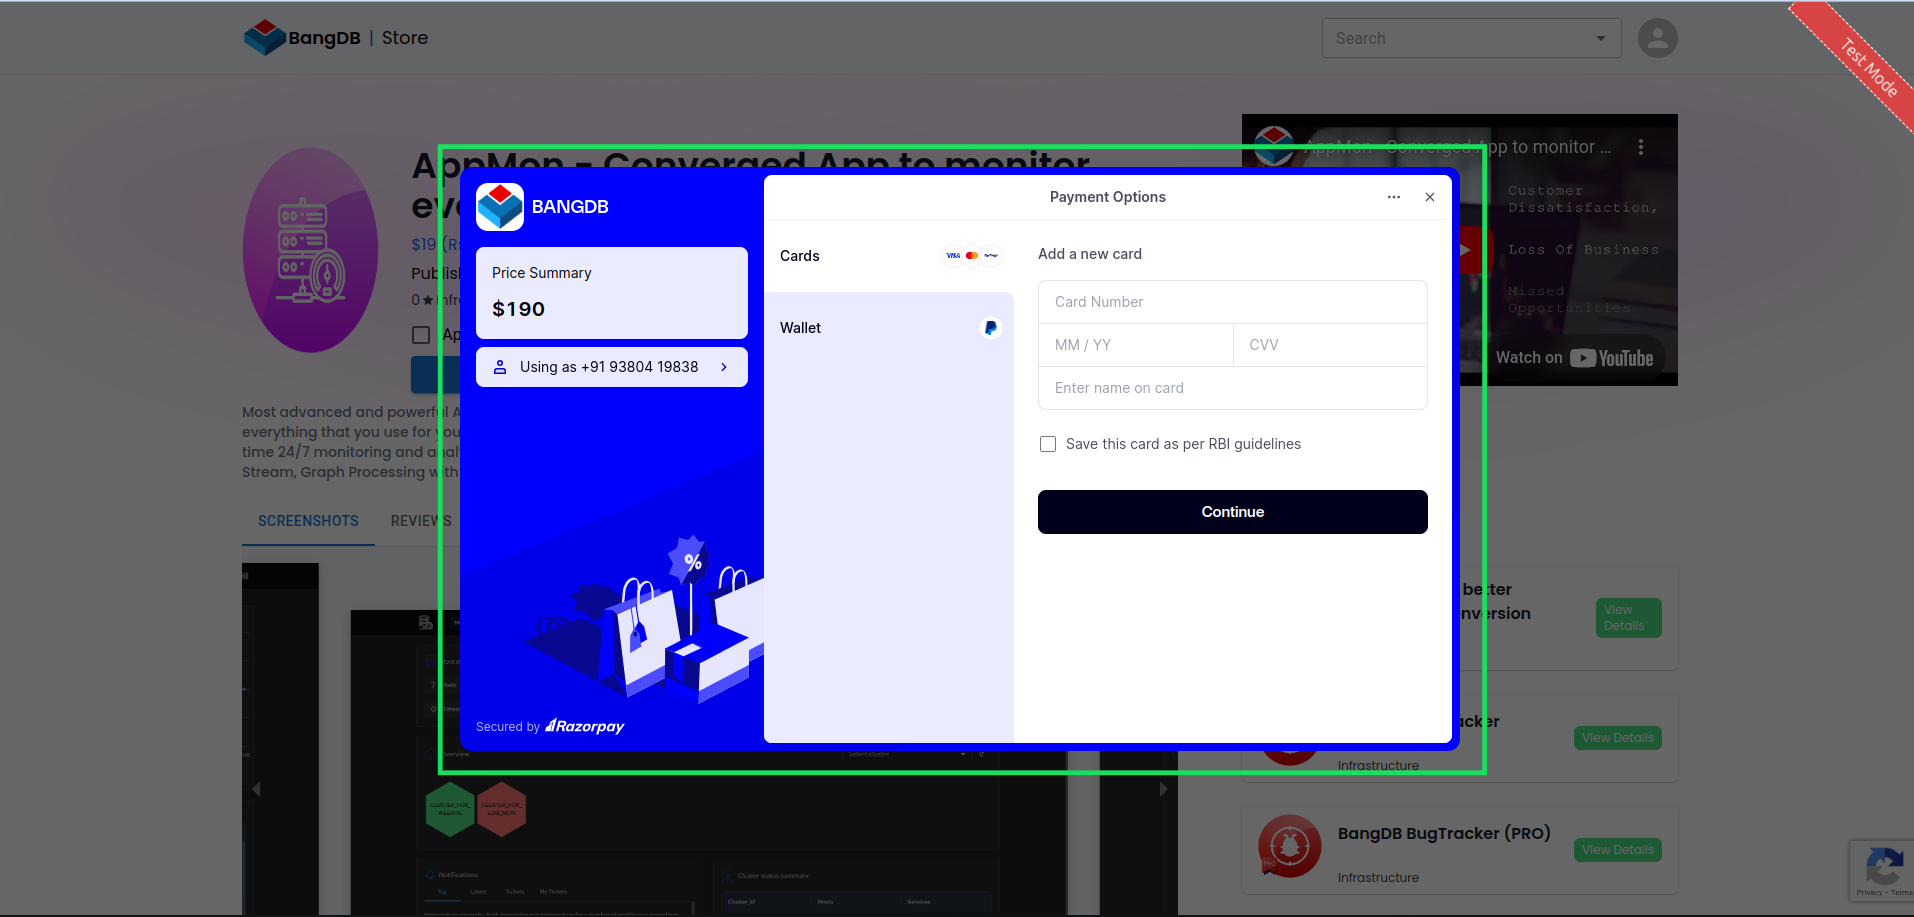
Step 11: Razorpay Payment
Complete the payment via the Razorpay popup that appears.
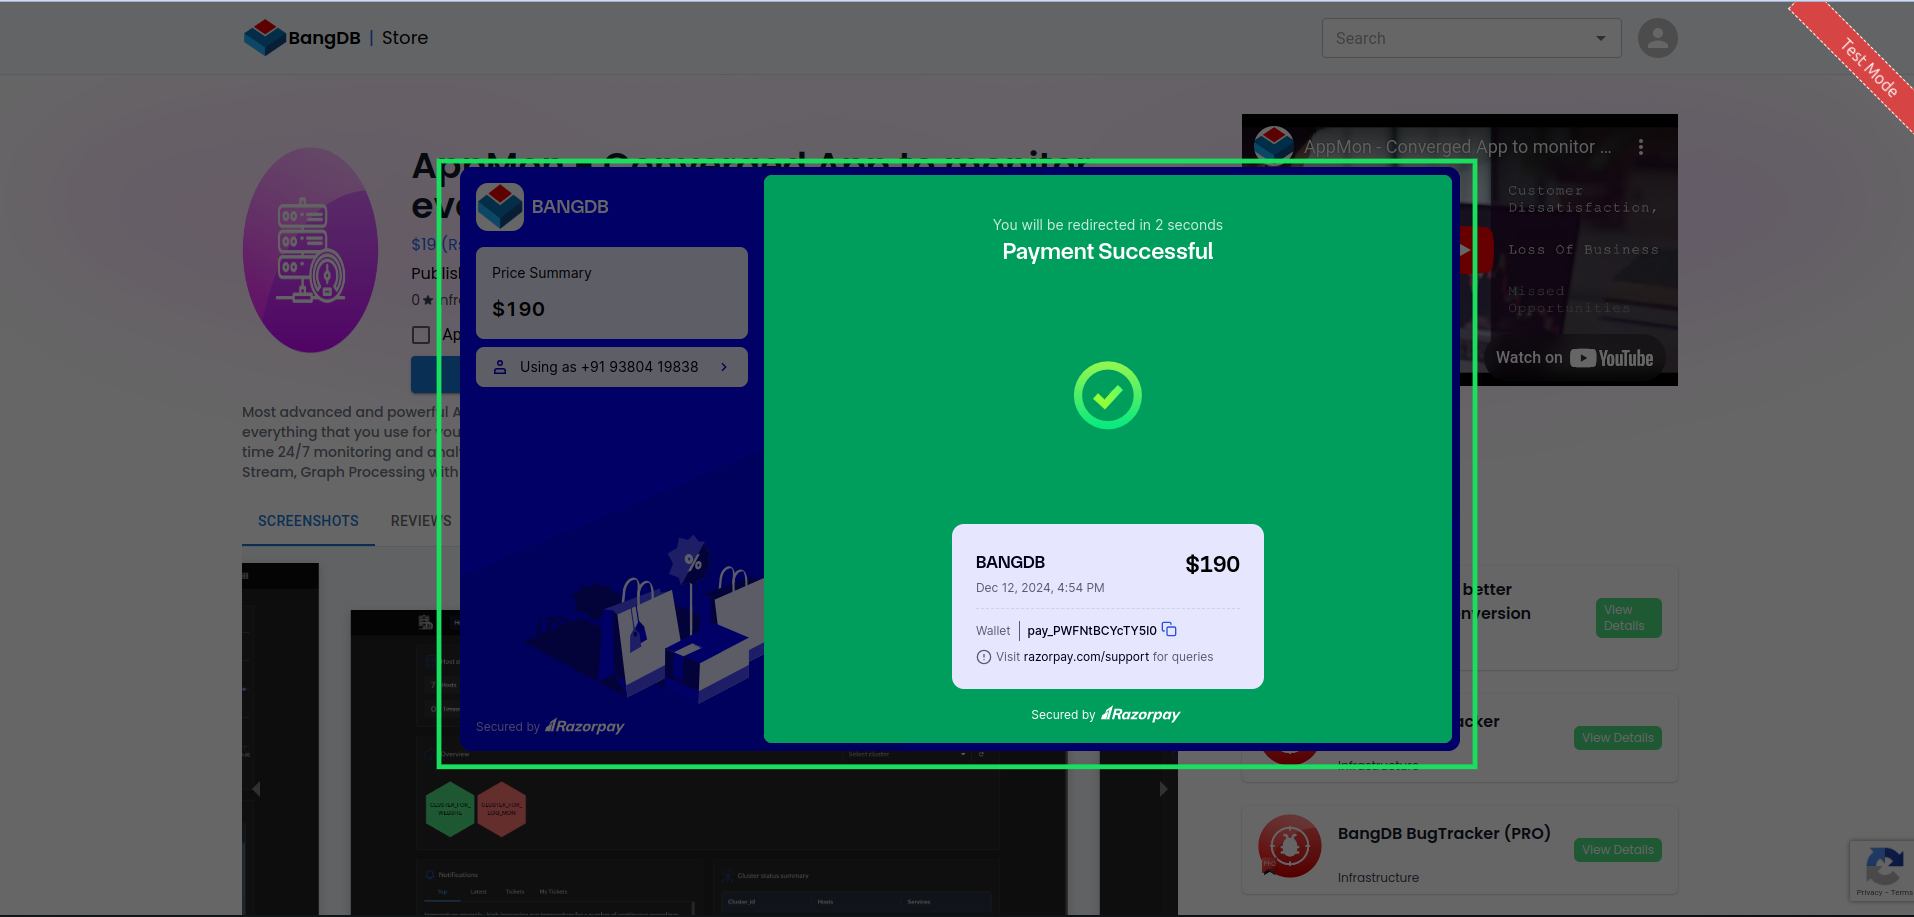
Step 12: Payment Success
After successful payment, a message will confirm your transaction.
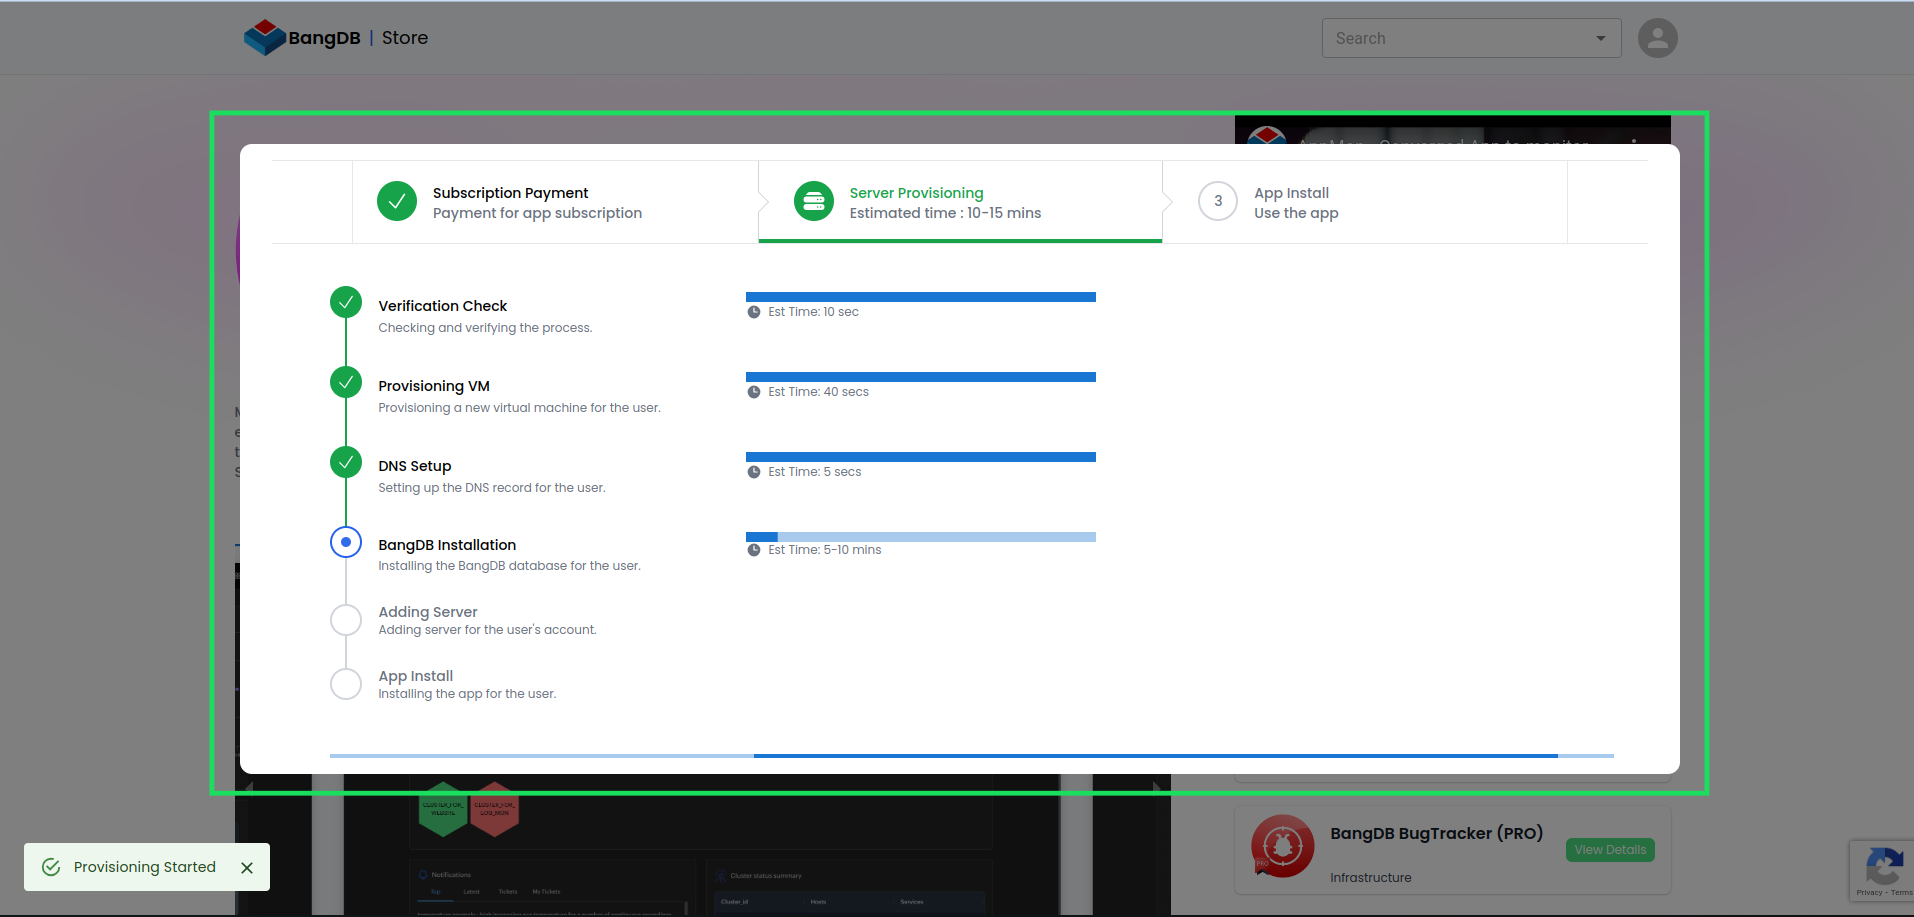
Step 13: Installation Progress
The installation process begins, showing a progress bar and estimated time for completion.
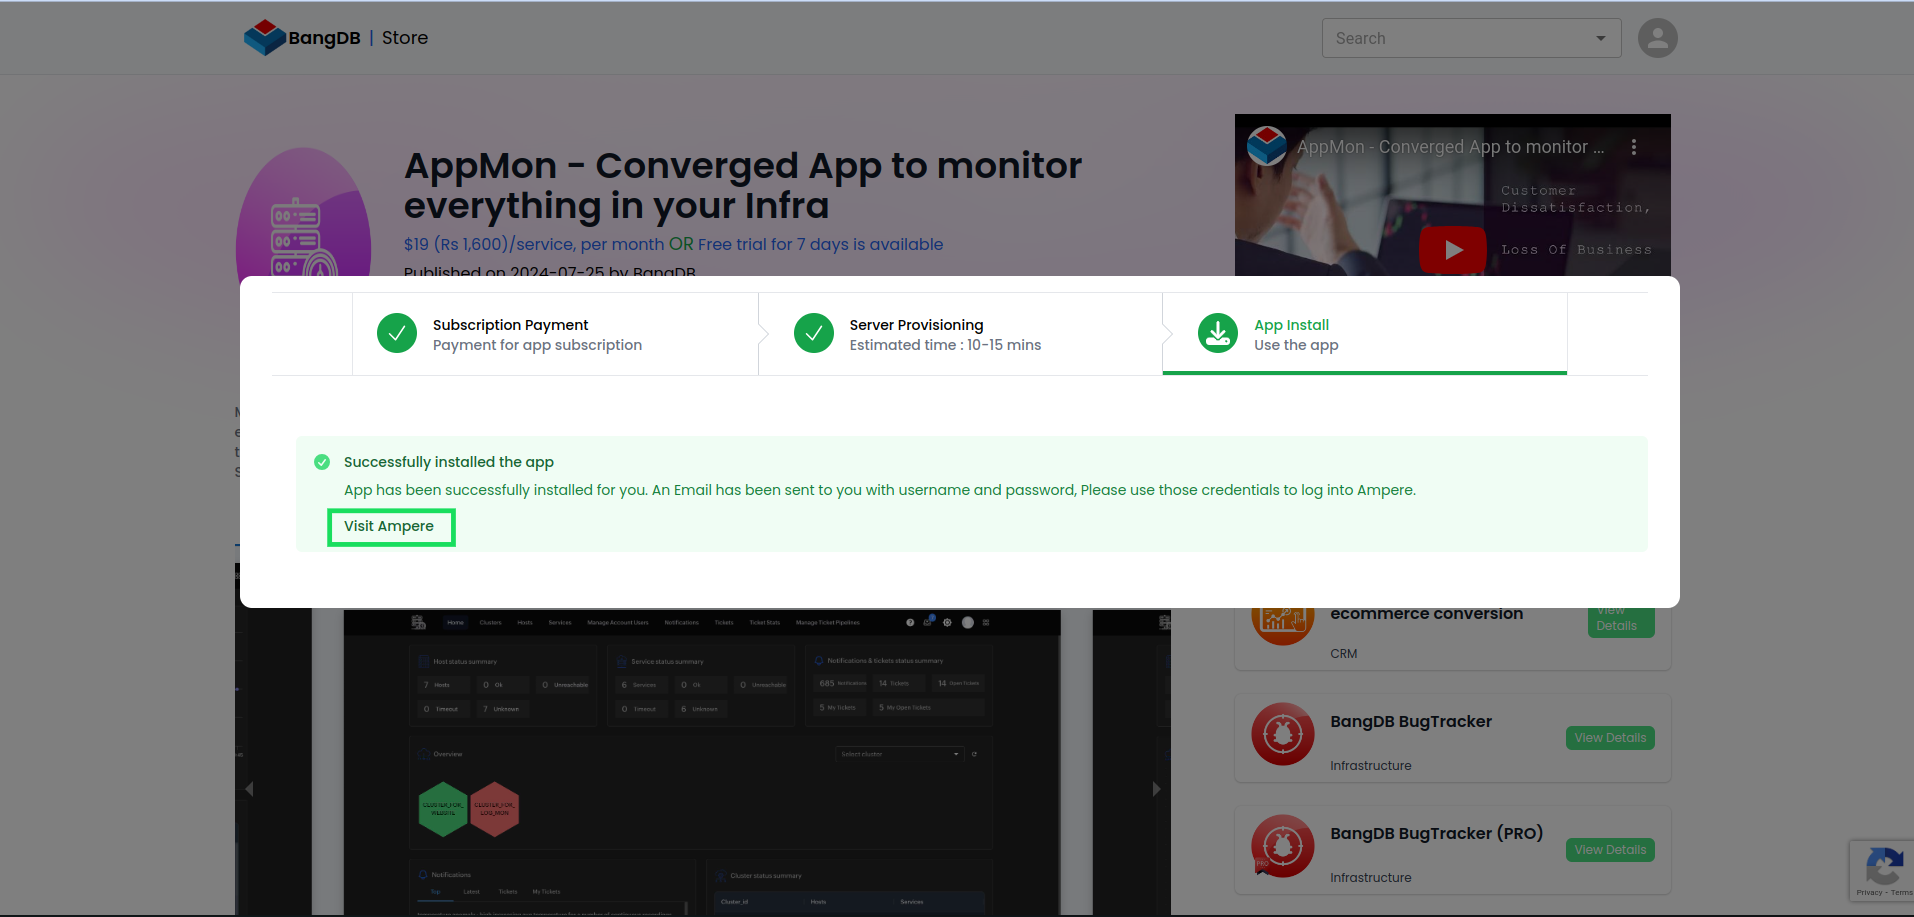
Step 14: Installation Success
After completion, a success message and Ampere link will be displayed to log into your purchased app.
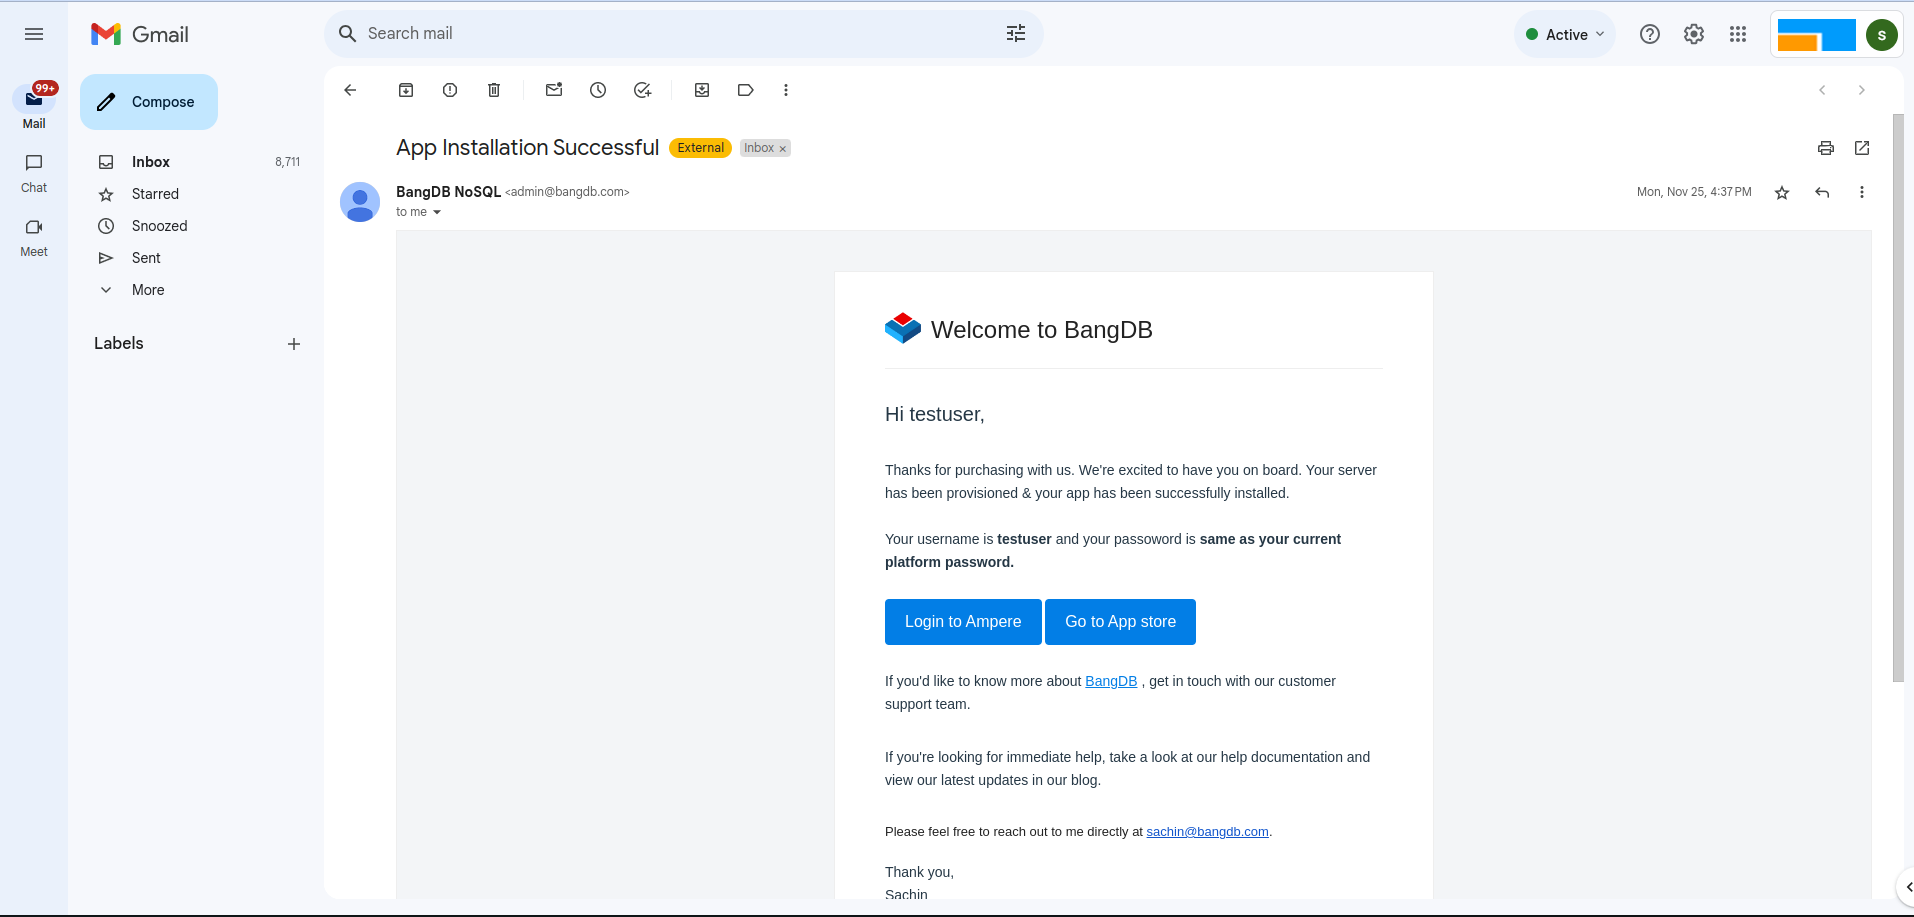
Step 15: Credentials and Invoice
Your login credentials (User ID and Password) and invoice will be sent to the email provided during signup.