How to Onboard a Company
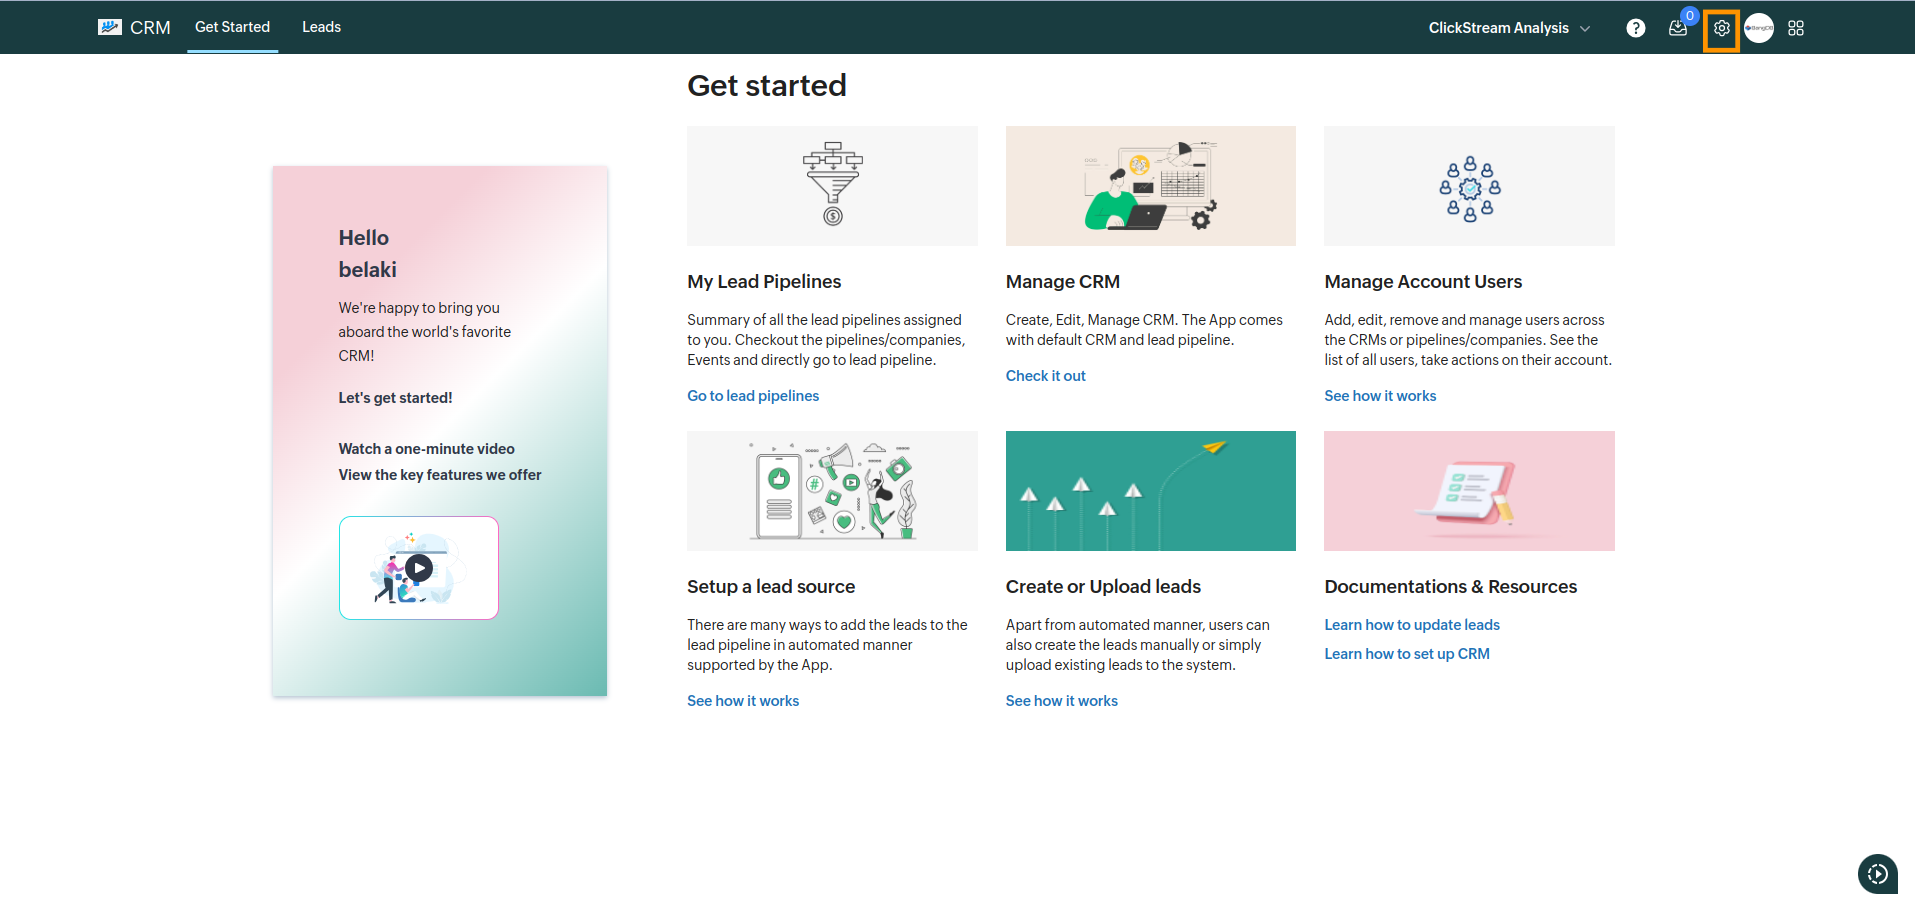
Click on the settings icon from the top navigation bar.
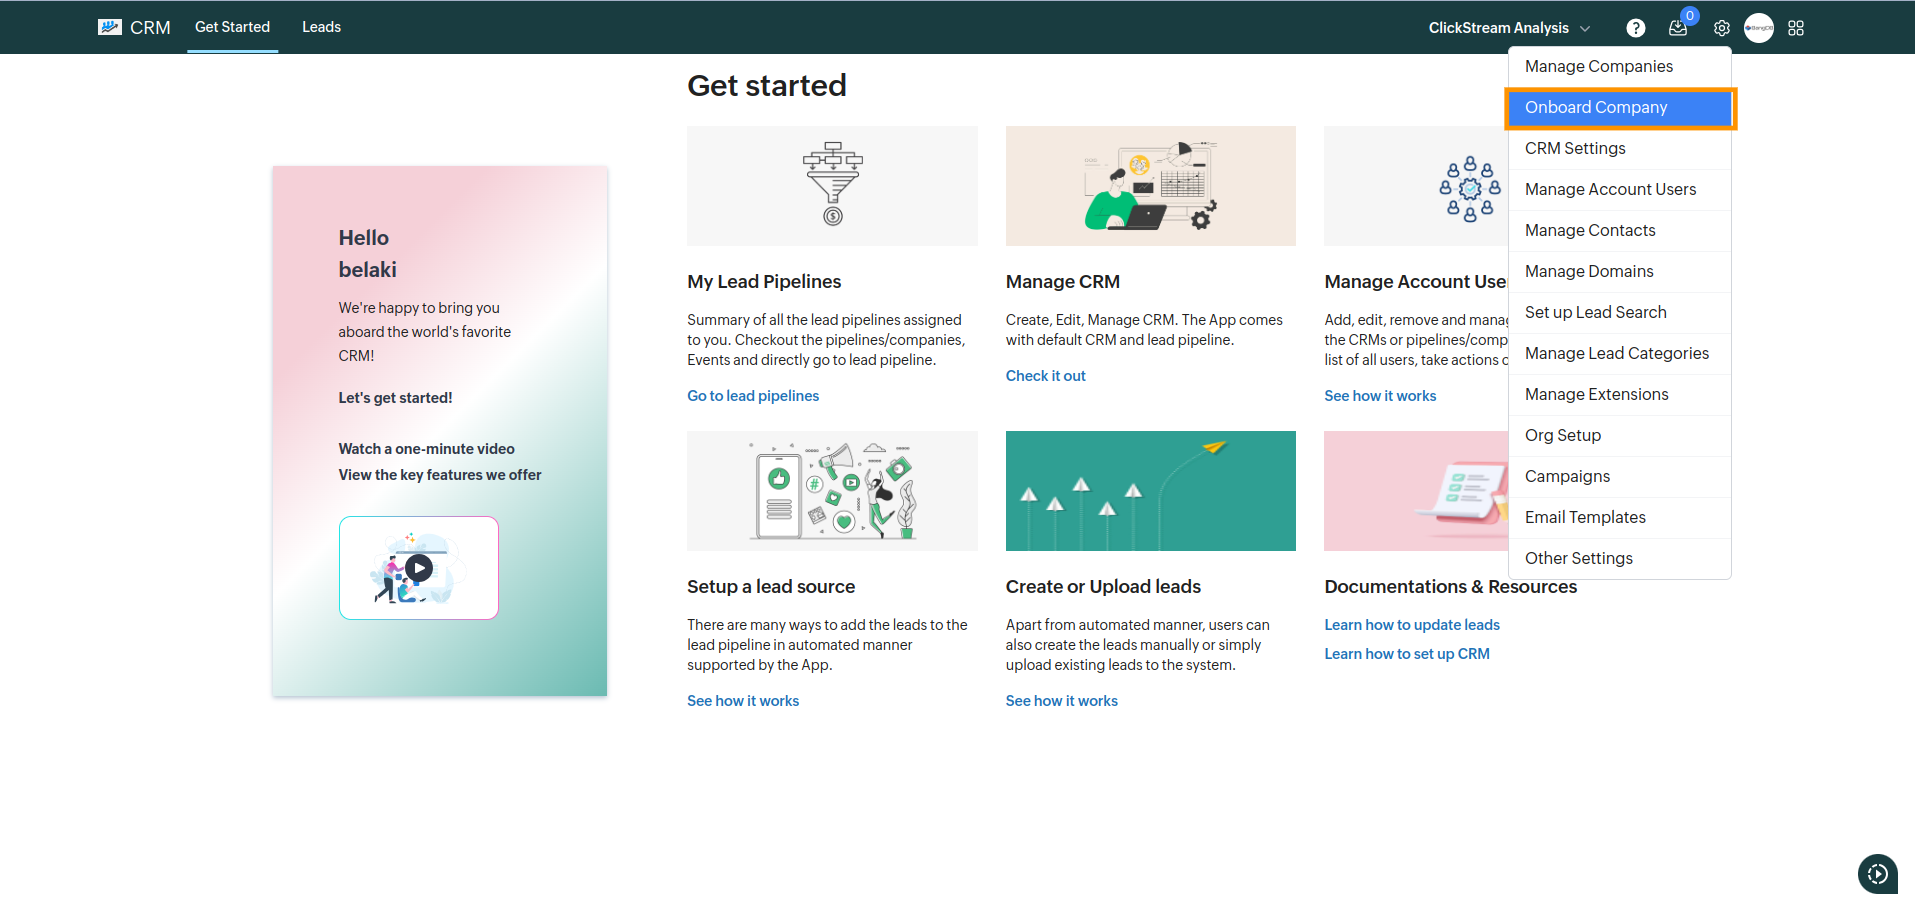
Select Onboard Company from the settings dropdown.
Clicking on it redirects to the Company Onboard page.
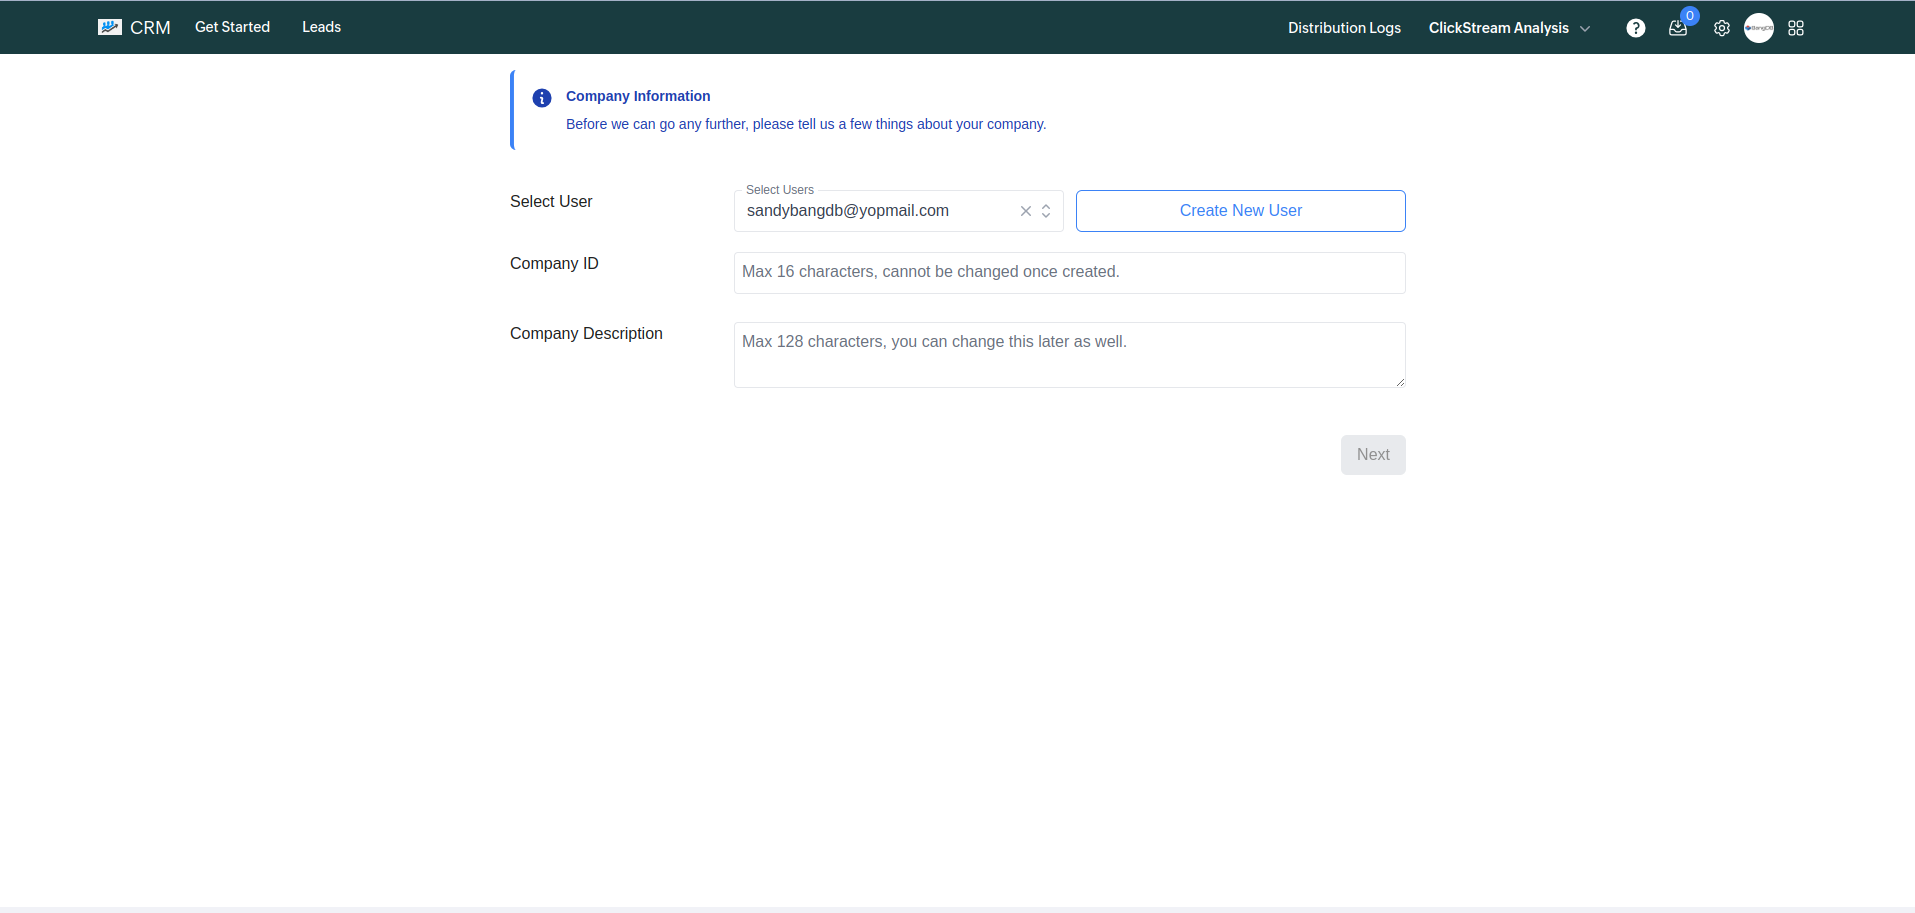
On the Company Onboard page, select a user to associate with the company from the dropdown. This only works if users are already present in the CRM. If no users are available, you need to create one using theCreate New User option.
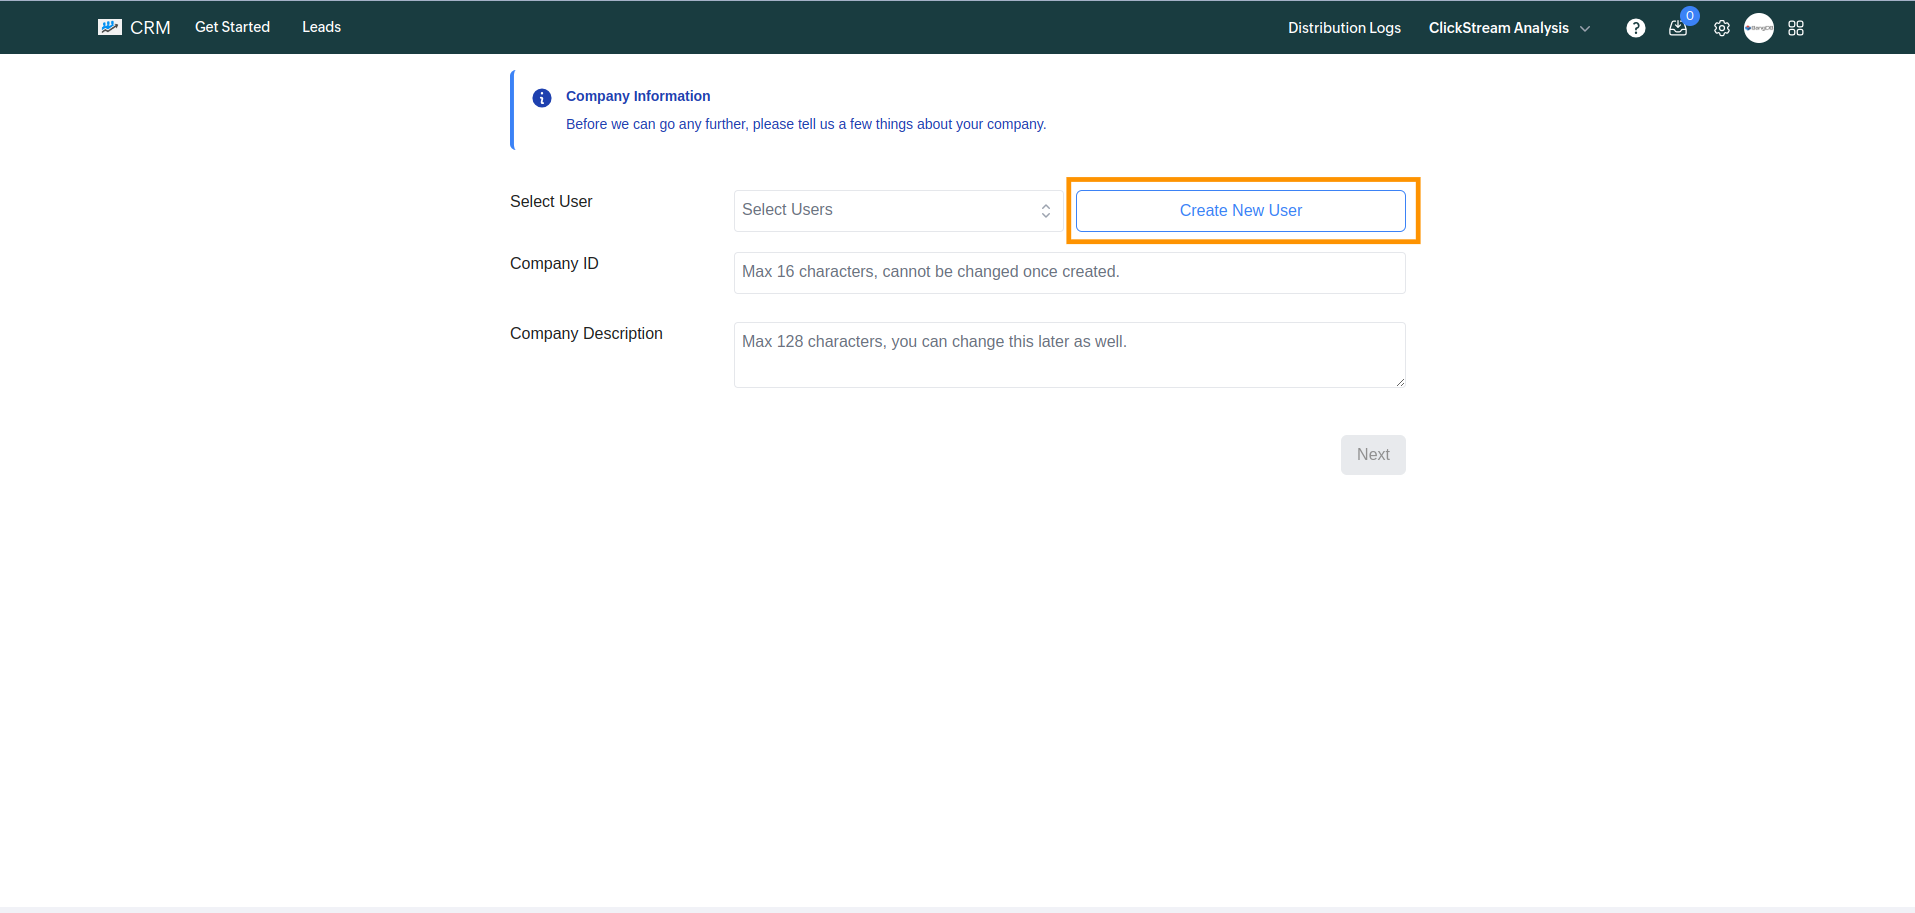
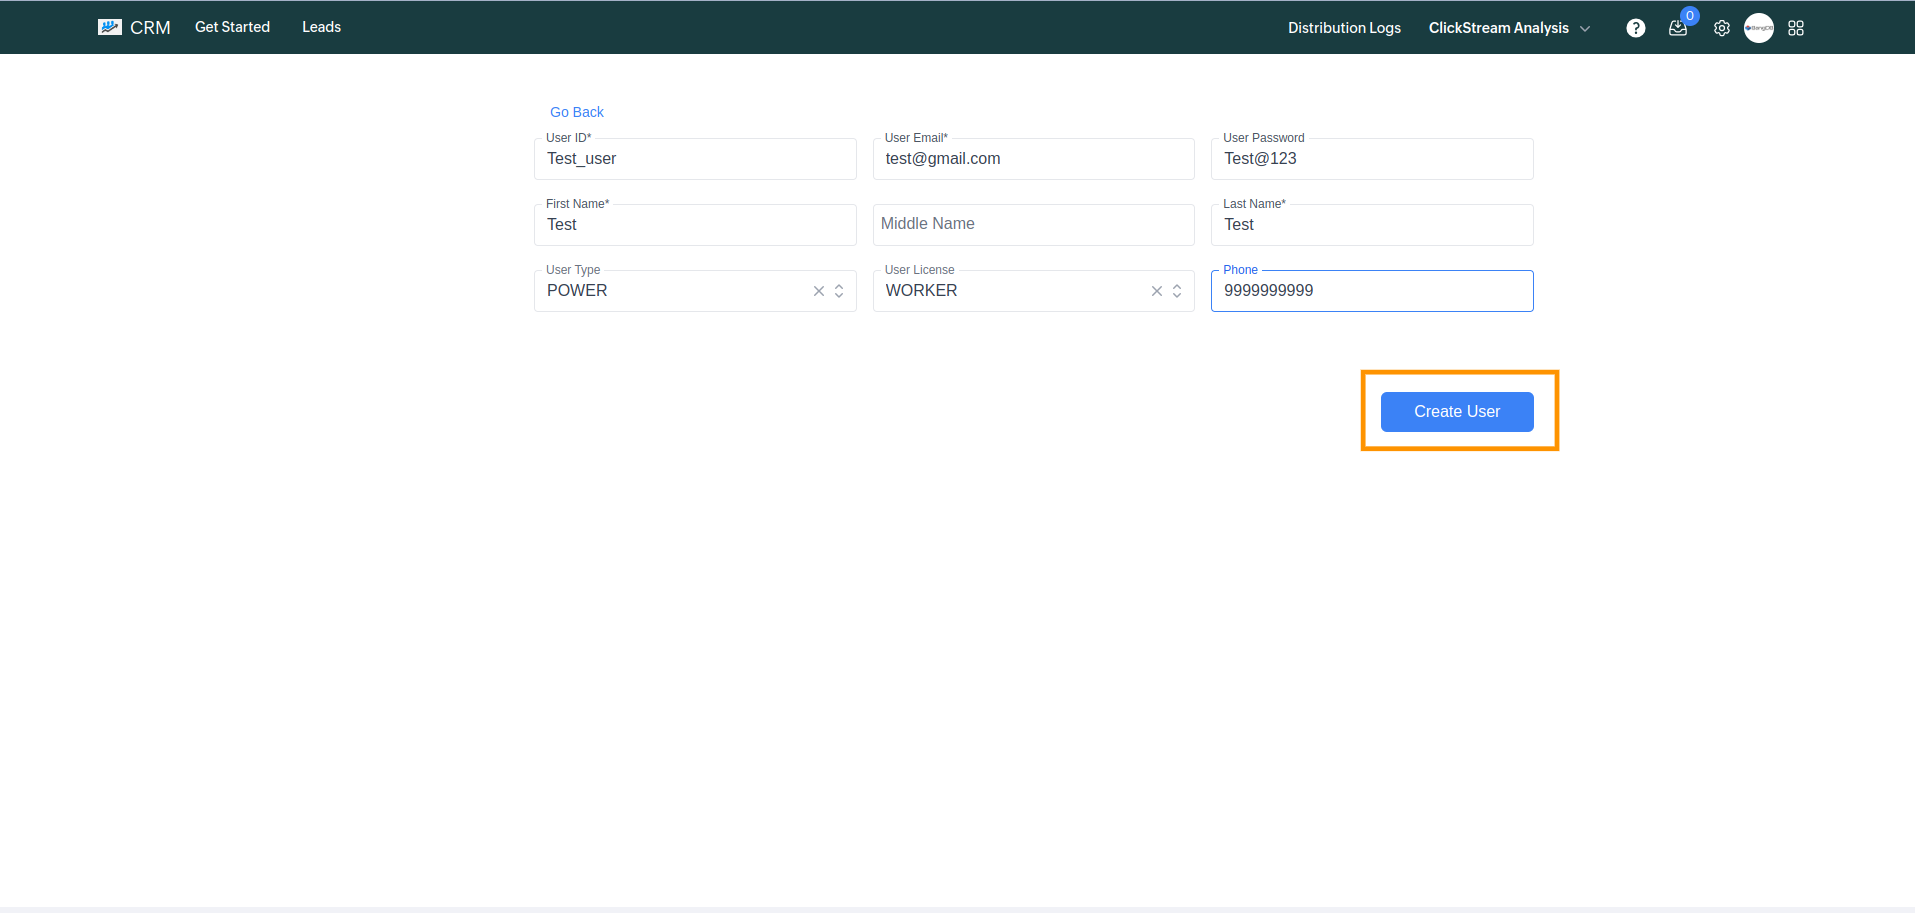
To create a new user, provide the following details:
- User ID: Test
- User Email: test@gmail.com
- Password: Test@123
- First Name: Test
- Last Name: User
- User Type: Select between Power or Normal (click here for more details).
- License Type: Default is Worker.
- Phone: 9999999999
Note: Ensure the email ID is valid, as the User ID and password will be sent to the provided email.
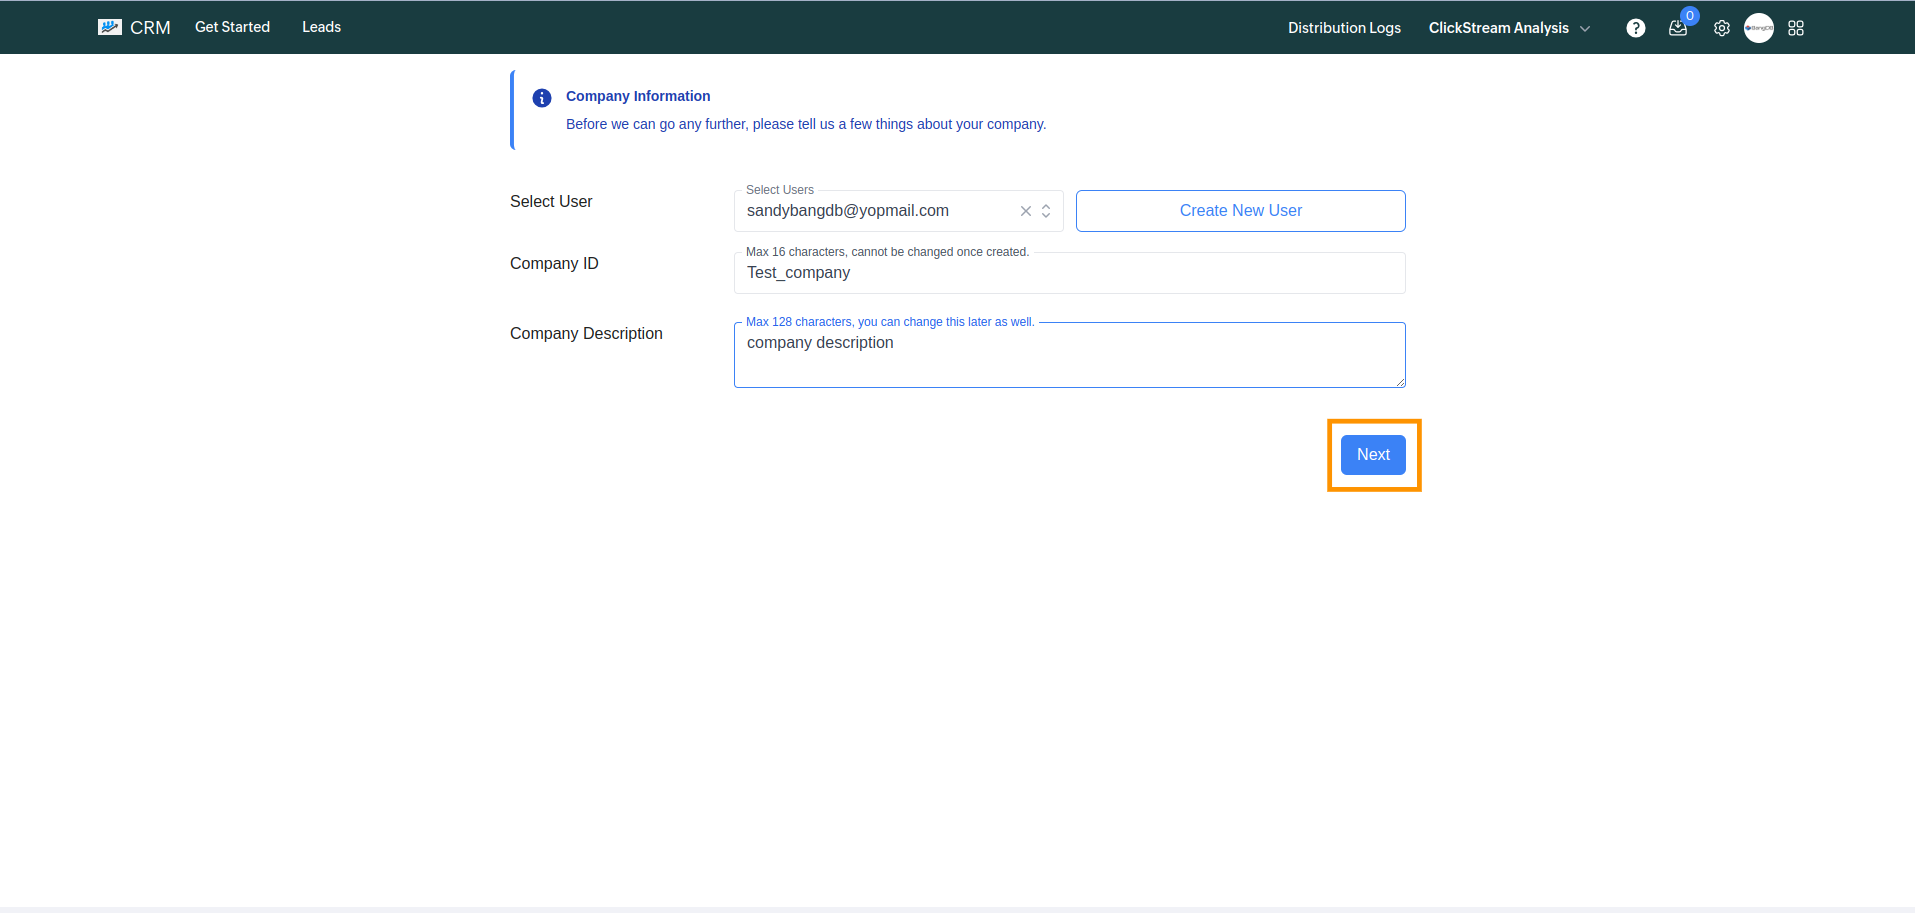
After creating the user, provide the company details:
- Company ID: Unique identifier
- Company Description: Add relevant information
Note: Once added, the company details cannot be changed.
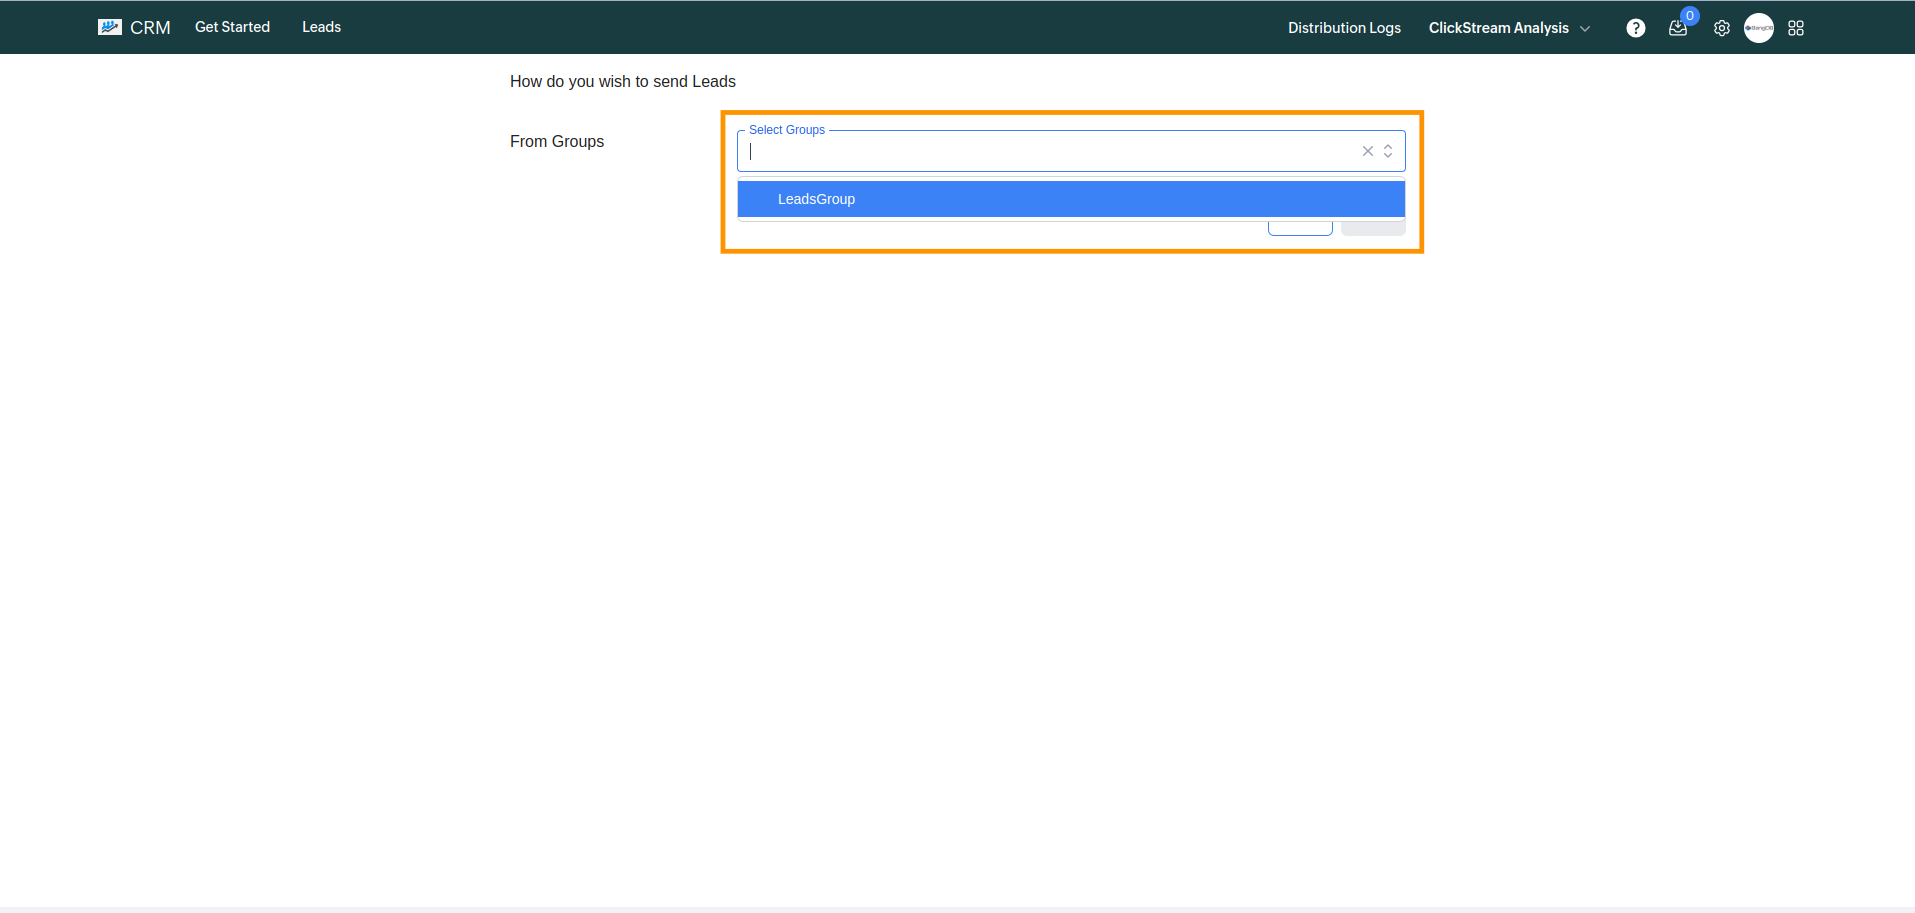
Next, select the Group to associate with the company.
If the group policy is set to FILTER, define conditions for leads to flow to the company. Example:
On your website, you have a field Part with optionsengine and transmission. If you want leads with "Part = engine" to flow to this company, set the filter accordingly. Use operations like equals, not equals, etc., and specify the value.
Note: If the group policy is ALL,RR, or RROBIN, filters are not required.
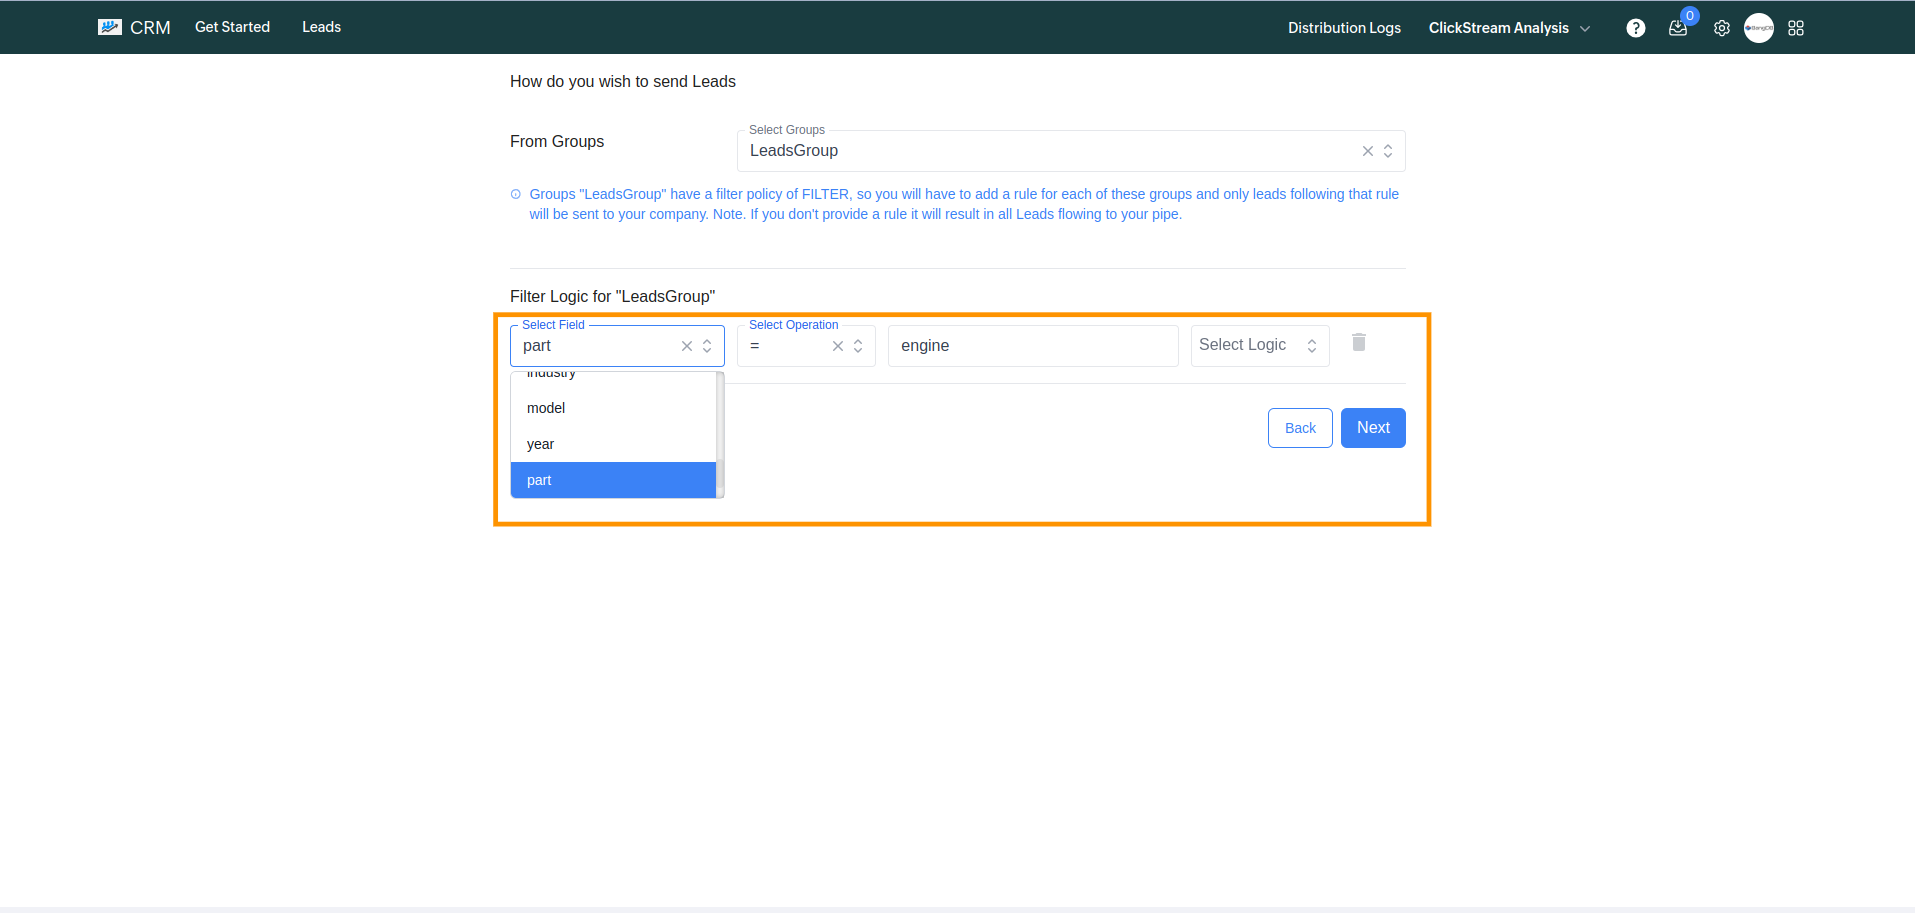
After selecting the group and adding filters (if applicable), click on the Next button.
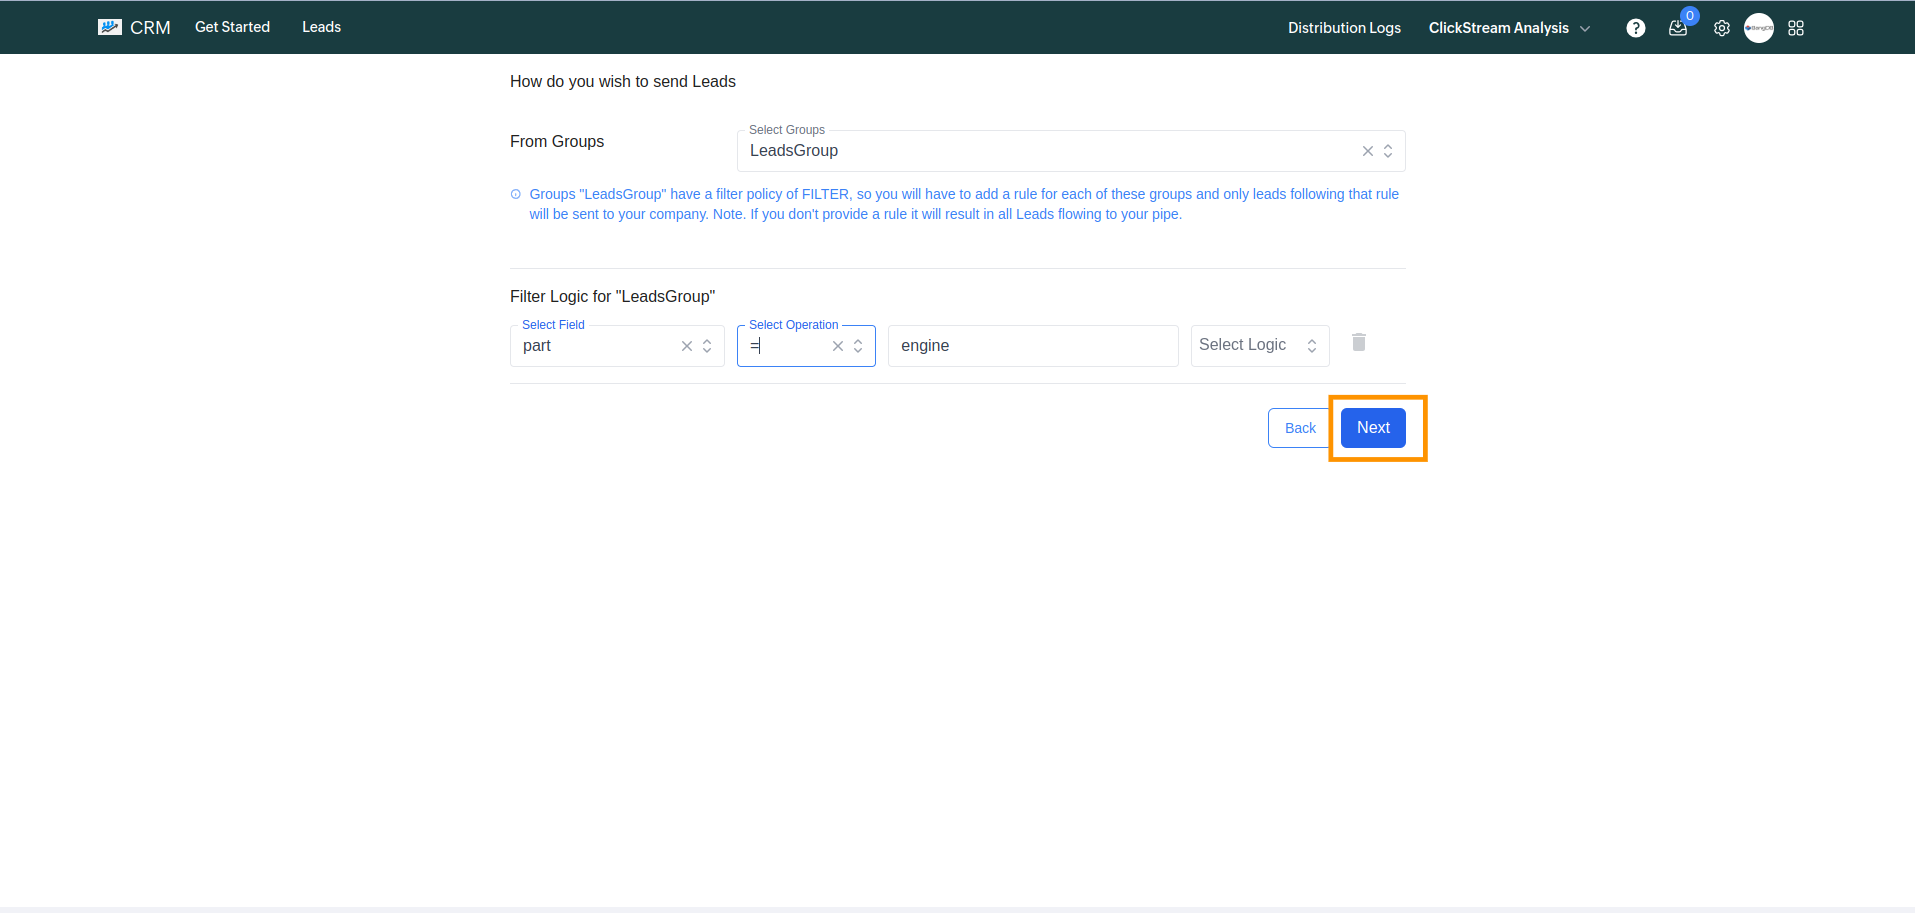
Click Next to proceed to the quota settings page.

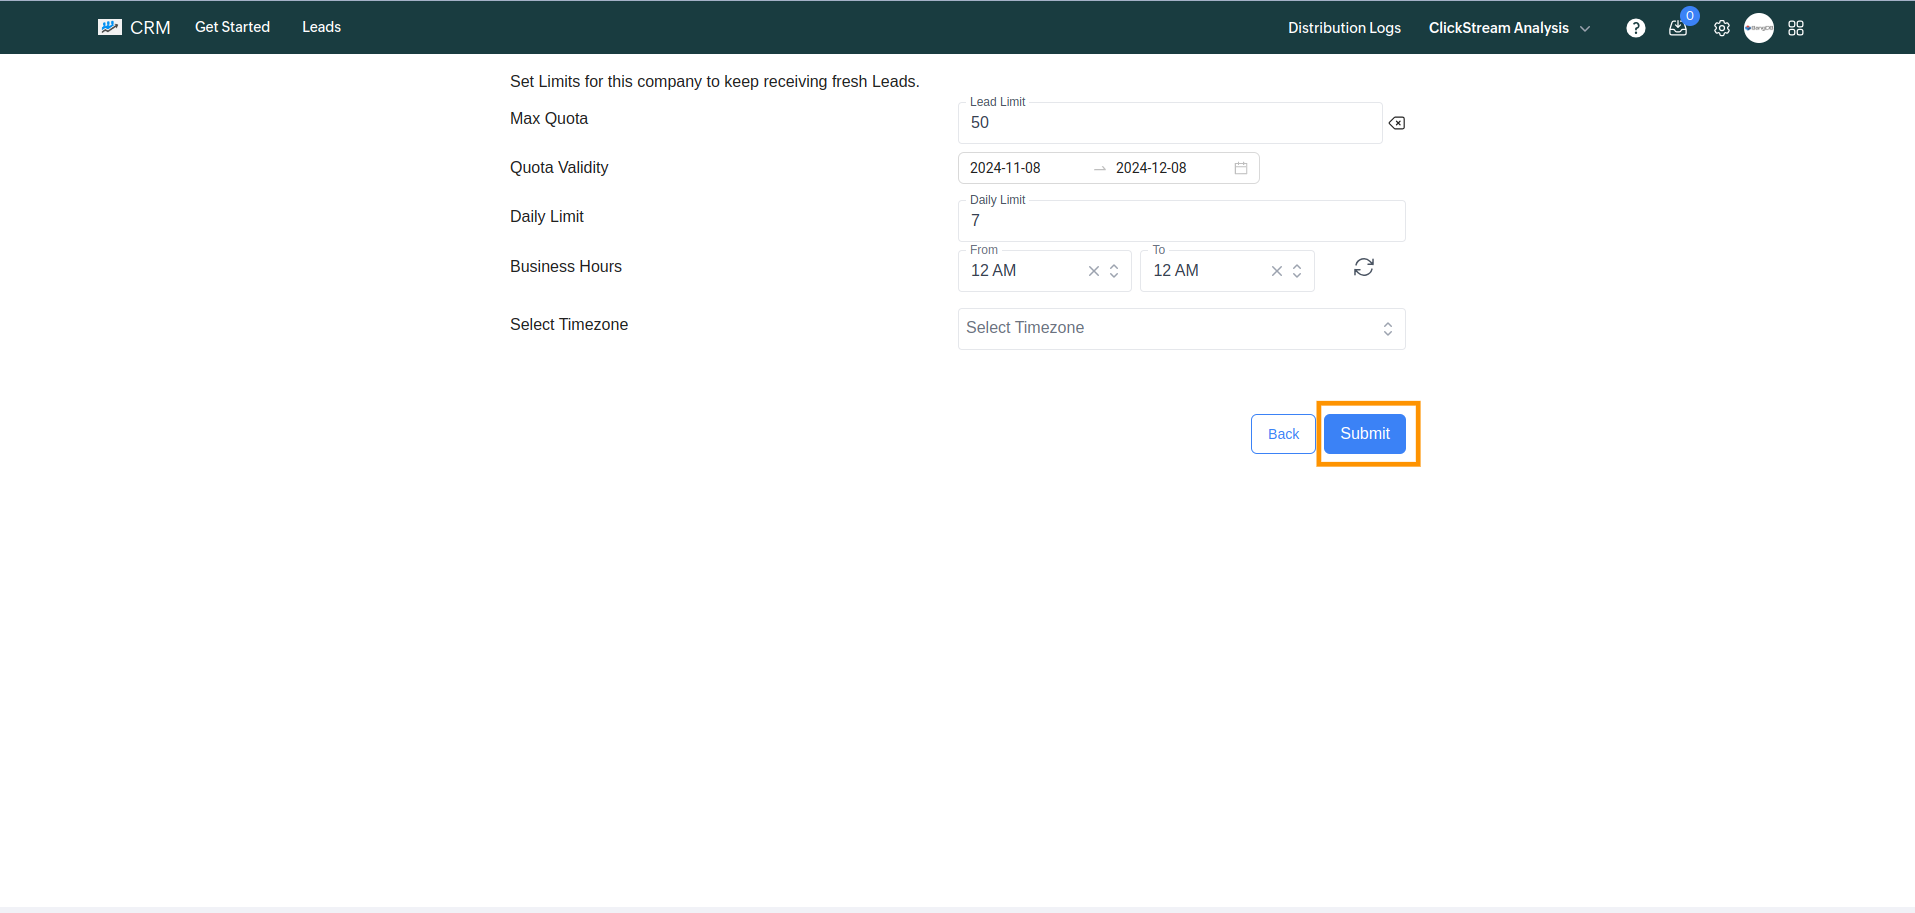
On the quota settings page (optional), you can:
- Set company lead quotas.
- Add daily limits and business hours.
- Define quota validity.
Click Submit to proceed.
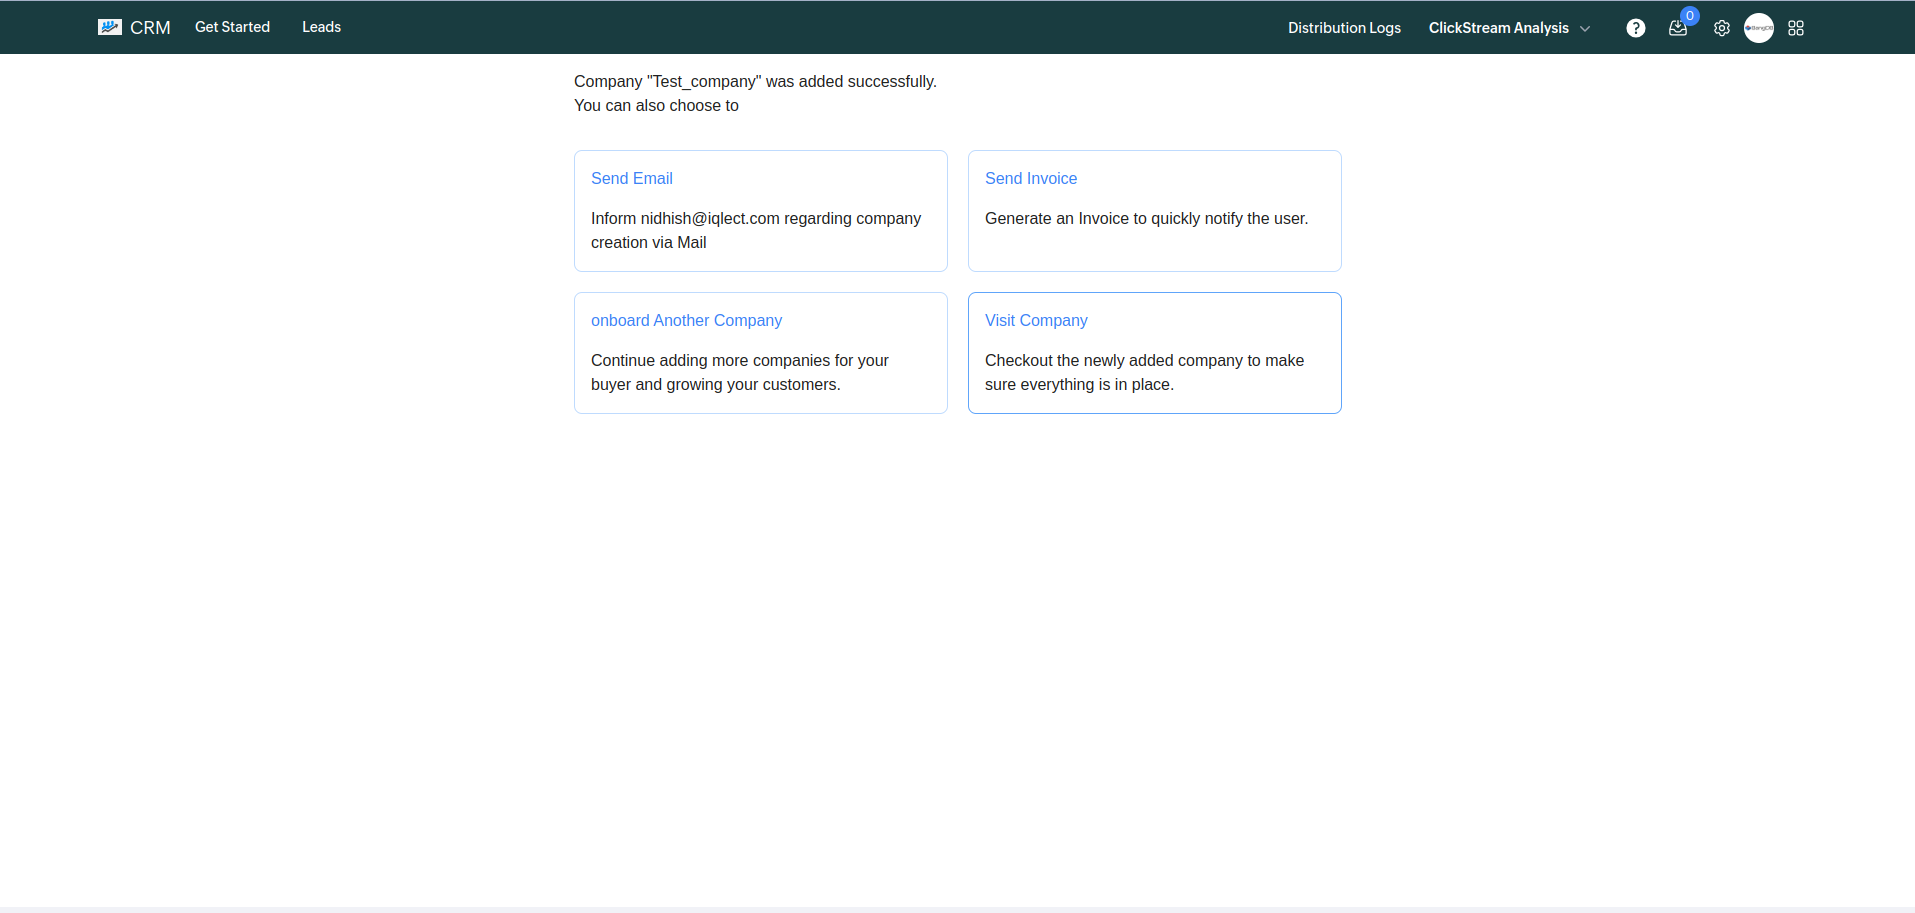
After submission, you can:
- Send an invoice to the company.
- Send a confirmation email.
- Visit the company page using the Visit Company option.
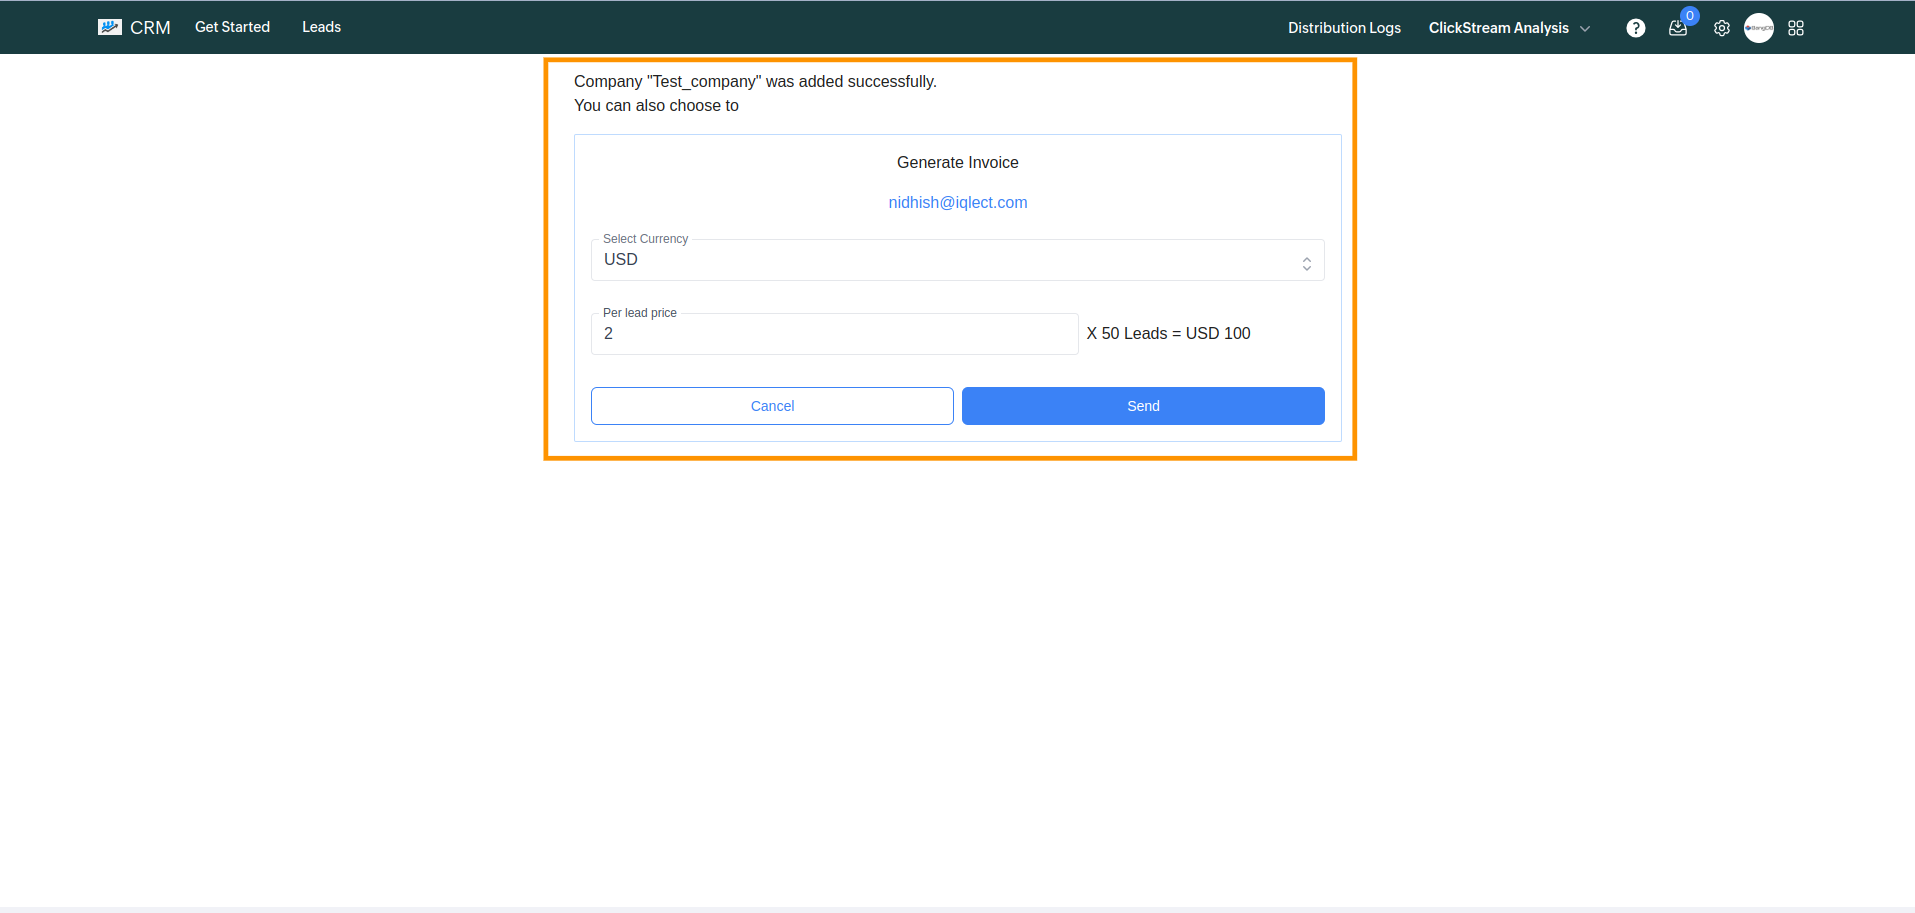
If sending an invoice, a popup will prompt you to:
- Enter the amount to invoice.
- Select the currency (e.g., USD, INR).
- Define cost per lead if a quota was set, or use a fixed price.
